Mega Rose Stencil

Disclosure: Where available I use compensated affiliate links which means if you make a purchase, I receive a small commission at no extra cost to you. Thank you so much for your support!
This post which includes a video is based on the online class by Erum Tasneem, Creative Coloring with Erum - Advanced Techniques Online Class. I used the Mega Rose Stencil to create four cards with slightly different techniques by the online class by Erum.
I enjoyed this class very much because I could see how Erum broke down the steps (that even I could follow!) to create beautiful cards. The techniques were so simple, yet so effective, garnering such wonderful results.
Do check out the video below.
Card #1 - Fabulous
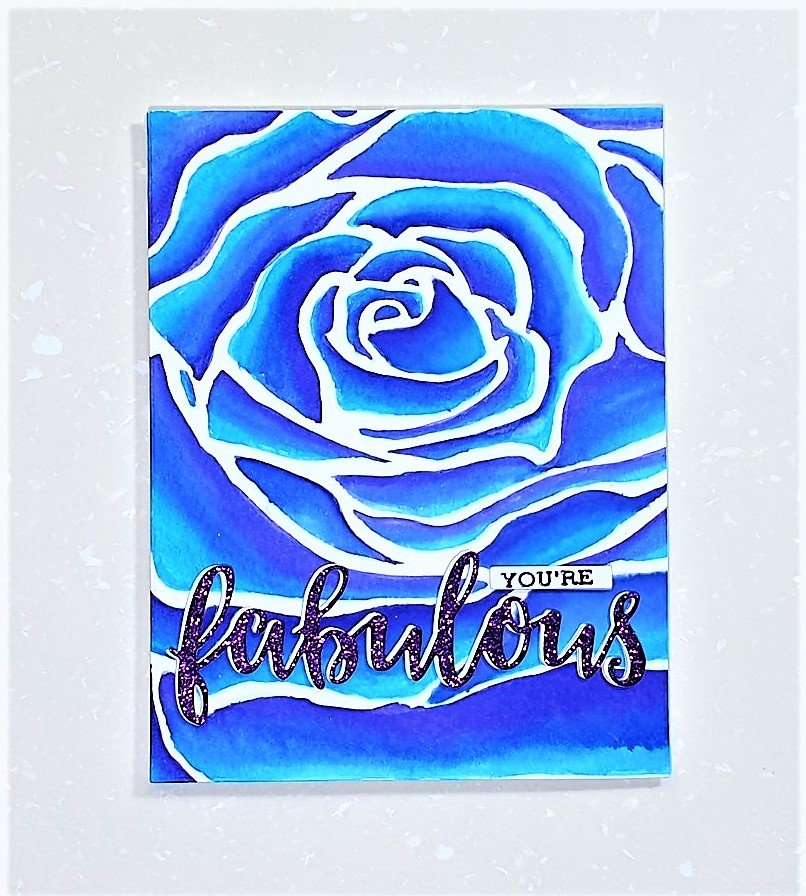
Adhere Mega Rose stencil (after spraying back of stencil with Pixie Spray, a temporary adhesive) to watercolour paper and apply Polar Bear crisp dye ink with a large blending tool. [Tip: Use an ink colour that is similar to the watercolor that you intend to colour the image, so the ink it wholly covered.] Remove stencil and wipe with a stamp shammy to remove ink residue on stencil.
Use Altenew watercolor brush markers Persian Blue, Ultramarine, and Sea Breeze to colour image, following the Polar Bear dye ink. This will take time, patience and perseverence is required.
Once dry, use Waffle Flower A7 layers die to cut watercolor panel to A7 card size, which is 5” by 7”. Back watercolor panel with fun foam for sturdiness and dimension and adhere to side folding A7 base card.
Die cut ‘fabulous’ from Altenew Script Words 2 Die in Tonic Studios Glitter Card Nebula Purple and die cut another two times in white cardstock and adhere all together for dimension. The sub-sentiment ‘you’re’ is from a longer sentiment within the Setiment Strips stamp set. [Tip: tape off the letters that you do not want with cellophane tape, ink sentiment, remove tape, and stamp onto card. This allows you to stretch you sentiment stamps and create your own sentiment phrases.] Sub-sentiment stamped with Versafine Clair Monarch ink and heat embossed with Crystal Clear embossing powder. Die cut with Photoplay Sentiment Strips die.

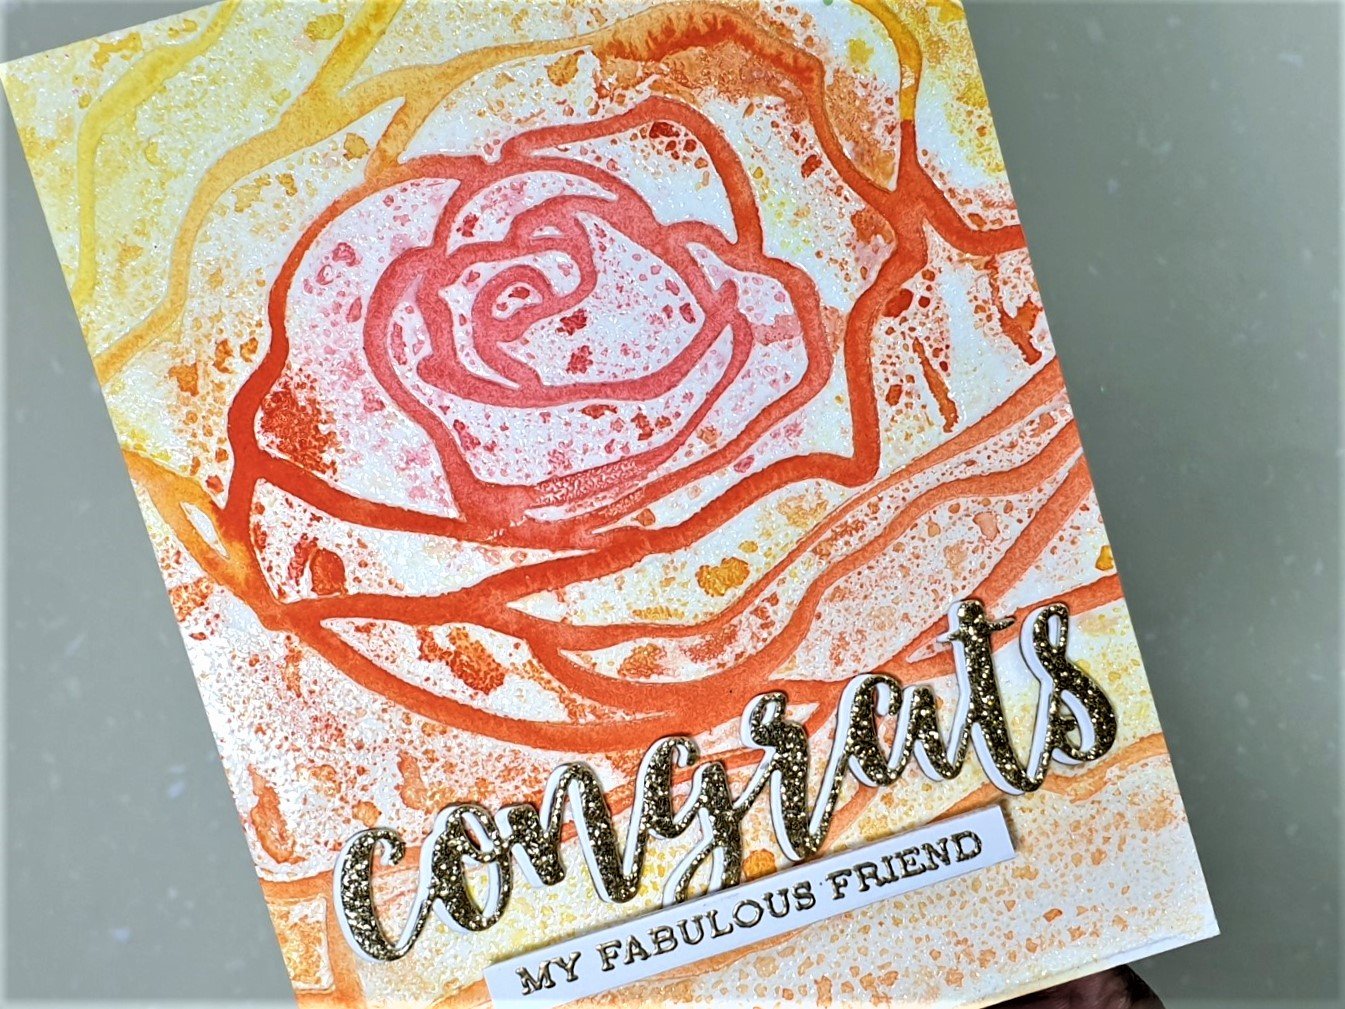
Card #2 - Congrats
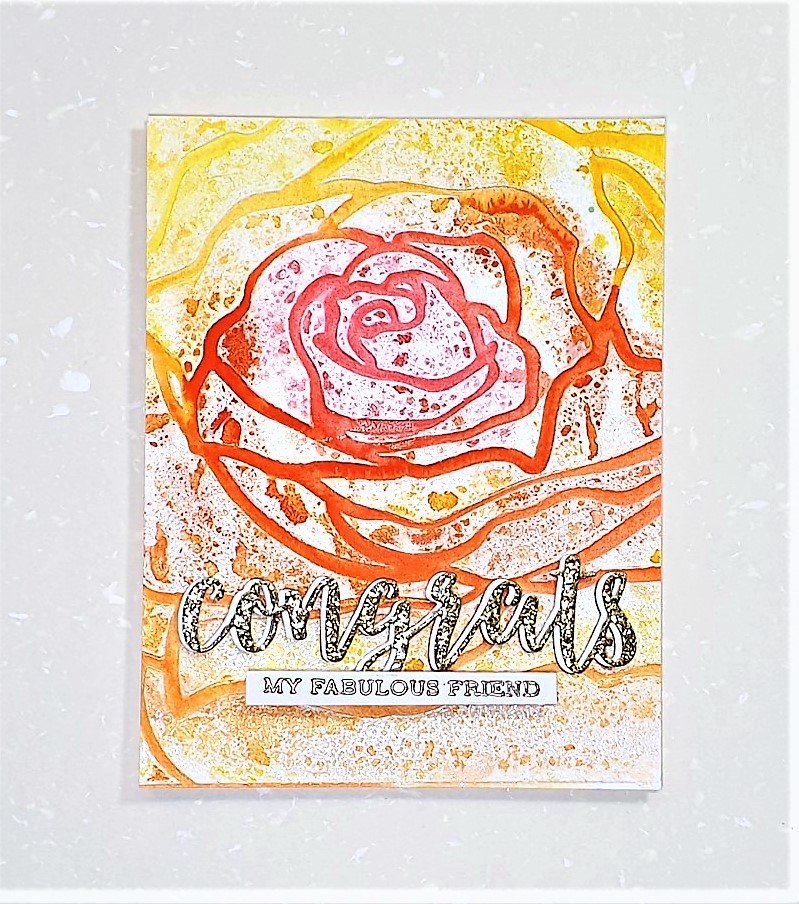
Adhere Mega Rose stencil (after spraying back of stencil with Pixie Spray, a temporary adhesive) to watercolour paper and apply Embossing Paste with a palette knife. [Tip: Remove stencil and wash immediately or soak in water so embossing paste does not harden on stencil and render it unusable.] Sprinkle Translucent Pearl embossing powder over embossing paste while still wet. Warm up heat tool and melt embossing powder and heat embossing paste by aiming heat tool to front of card. Direct heat to the embossing paste will make the embossing paste puff and provide some dimension to image.
Once dry, apply Altenew 24 pan artist grade watercolor [Summer Afternoon, Fiery Sunset, Warm & Cozy, Tea Party] to image. Spray water to pan set to activate pigment and also spray fine mist of water to image - this will allow the pigment to spread easily. Use round paint brush to apply and spread watercolor. Leave to air dry.
Die cut ‘congrats’ from Altenew Scripts Word Die in Gilded Glitter cardstock, Citrine and die cut another two times in white cardstock. Offset the Citrine die cut onto the double layered white die cut before adhering to card front. The sub-sentiment is from Altenew Sentiment Strips 2 stamp set. Stamp sub-sentiment in embossing ink, sprinkle Antique Gold embossing powder and melt embossing powder with heat tool.
[Tip: To ensure the Embossing Paste remains the right consistency for use and does not harden, place a piece of Press ‘N Seal or plastic on top of the container before screwing the cover close.]
Card #3 - Sweet

Adhere Mega Rose stencil (after spraying back of stencil with Pixie Spray, a temporary adhesive) to watercolour paper and apply Embossing Paste with a palette knife. [Tip: Remove stencil and wash immediately or soak in water so embossing paste does not harden on stencil and render it unusable.] Sprinkle Translucent Pearl embossing powder over embossing paste while still wet. Warm up heat tool and melt embossing powder and heat embossing paste by aiming heat tool at back of card, so only the embossing powder melt producing a shiny sheen and the embossing paste remains flat.
Once dry, apply Altenew 36 pan watercolor [Mountain Mist, Lagoon, Ocean Waves, Dusk, Desert Night] to image. Spray water to pan set to activate pigment and also spray fine mist of water to image - this will allow the pigment to spread easily. Use round paint brush to apply and spread watercolor. Leave to air dry.
Die cut ‘sweet’ from Altenew Scripts Word 3 Die in Ocean Reflection Glitter cardstock, Blue Apatite, and die cut another two times in white cardstock. Sub-sentiment from Sentiment Strips stamp set stamped with Versafine Clair Twilight ink and heat embossed with Crystal Clear embossing powder.

Card #4 - Love
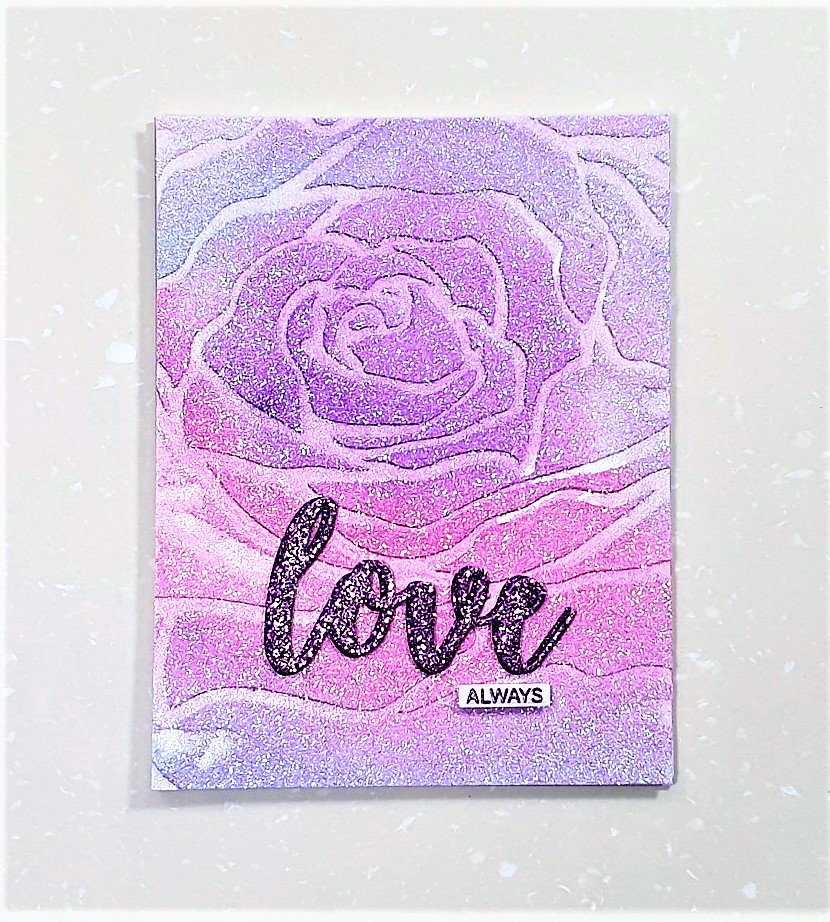
Adhere Mega Rose stencil (after spraying back of stencil with Pixie Spray, a temporary adhesive) to watercolour paper and apply Embossing Paste with a palette knife. [Tip: Remove stencil and wash immediately or soak in water so embossing paste does not harden on stencil and render it unusable.] Sprinkle crystal glitter onto emsbosing paste while it is still wet. Leave card panel to air dry.
Once dry, apply Altenew 24 pan artist grade watercolor [Shades of Purple, Cherry Blossom, Lapis Lazuli, Deep Blue Seas] to image. Spray water to pan set to activate pigment and also spray fine mist of water to image - this will allow the pigment to spread easily. Use round paint brush to apply and spread watercolor. Leave to air dry.
Die cut ‘love’ from Altenew Script Words die with Tonic Studios Glitter Card Nebula Purple and Berry Fizz and die cut another two times in white cardstock. Sub-sentiment from Timeless Tulips stamp set stamped with Versafine Clair Purple Delight ink and heat embossed with Crystal Clear embossing powder.
Thank you for stopping by and do leave a comment if you have a query or if you just want to say hi. Have a lovely day.

Disclosure: Where available I use compensated affiliate links which means if you make a purchase, I receive a small commission at no extra cost to you. Thank you so much for your support!