

Altenew Level 2 Final Challenge (Part 2) - Masculine Cards
Warning: This is a long blog post :)
This post which includes a video is about my Altenew Level 2 Final Challenge submission, Part 2, which is to create four masculine cards with specific themes, Birthday, Love/Thinking of You, Anniversary, and Encouragement.
Do check here for Part 1 of the Level 2 Final Challenge where I created a storage solution for Altenew Watercolor Brush Markers for the altered item project.
The Altenew Level 2 Final Challenge Ask
Select ANY 3 components from the classes in Level 1 or 2 (e.g., layering 1/2, Let it shine, stencil techniques)
Explain the 3 components that you’ve chosen for the project
Share design tips (if any)
Make four masculine (Themes are; birthday, Love/Thinking of You, Anniversary, and Encouragement)
Make an Altered Item/Upcycled Project - see here
Challenge blog post: Detailed step-by-step photo tutorial and/or YouTube video
Minimum of 10 photos (close-up and process)
Complete the assignment by 13th August 2022!
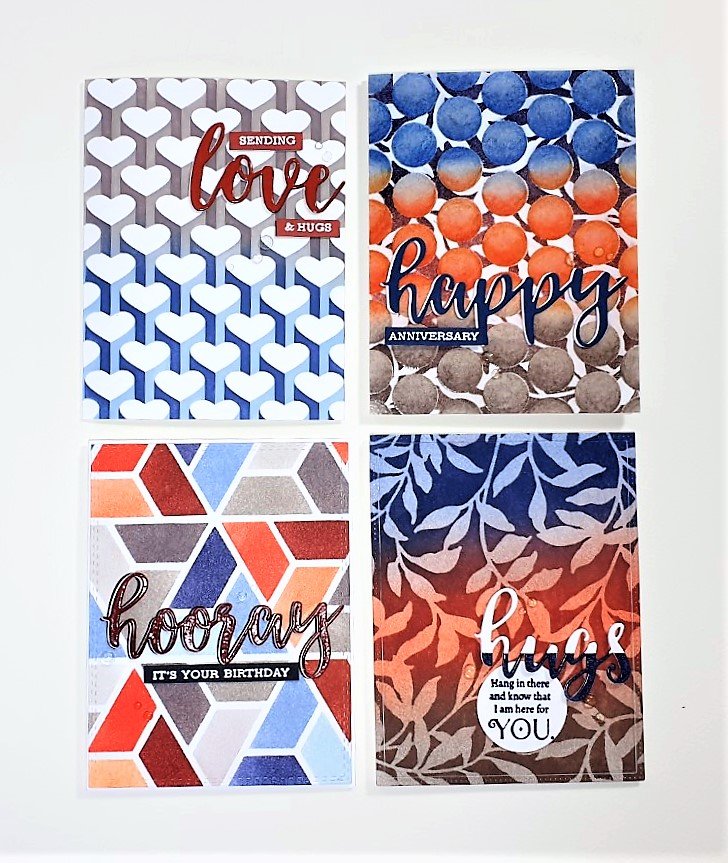
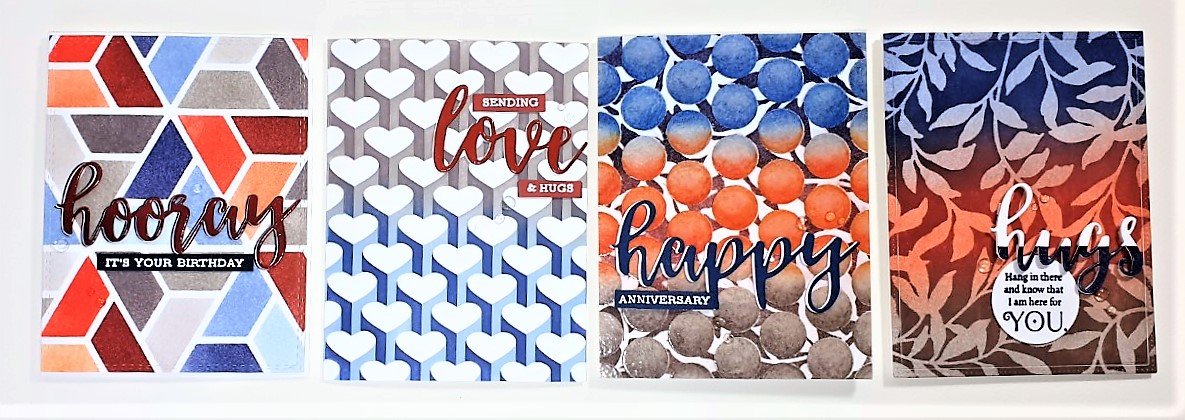
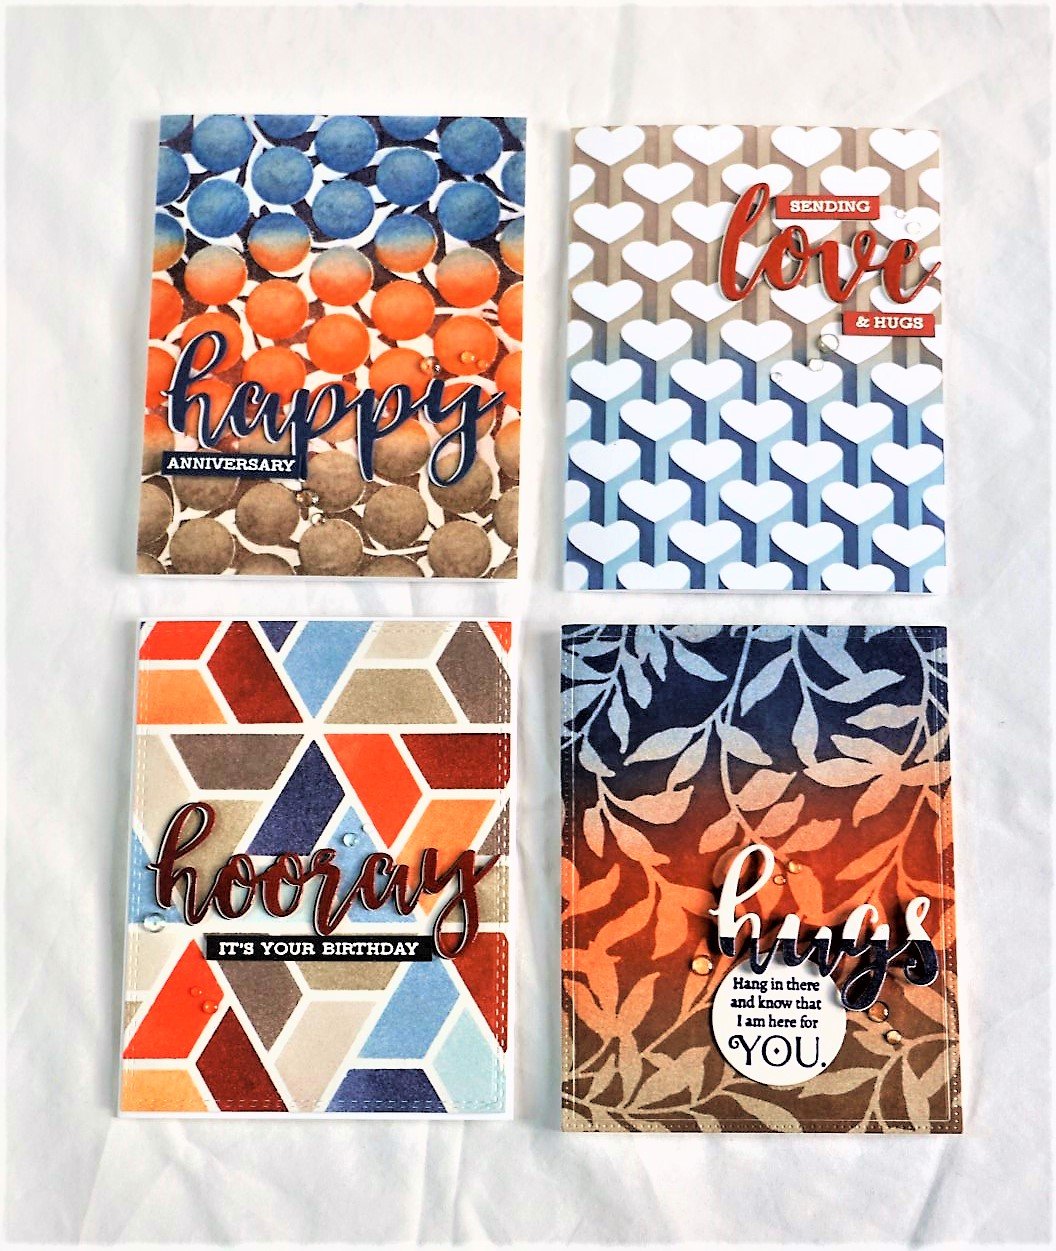
Four Masculine Cards

Check out the video
Gallery of Cards Created


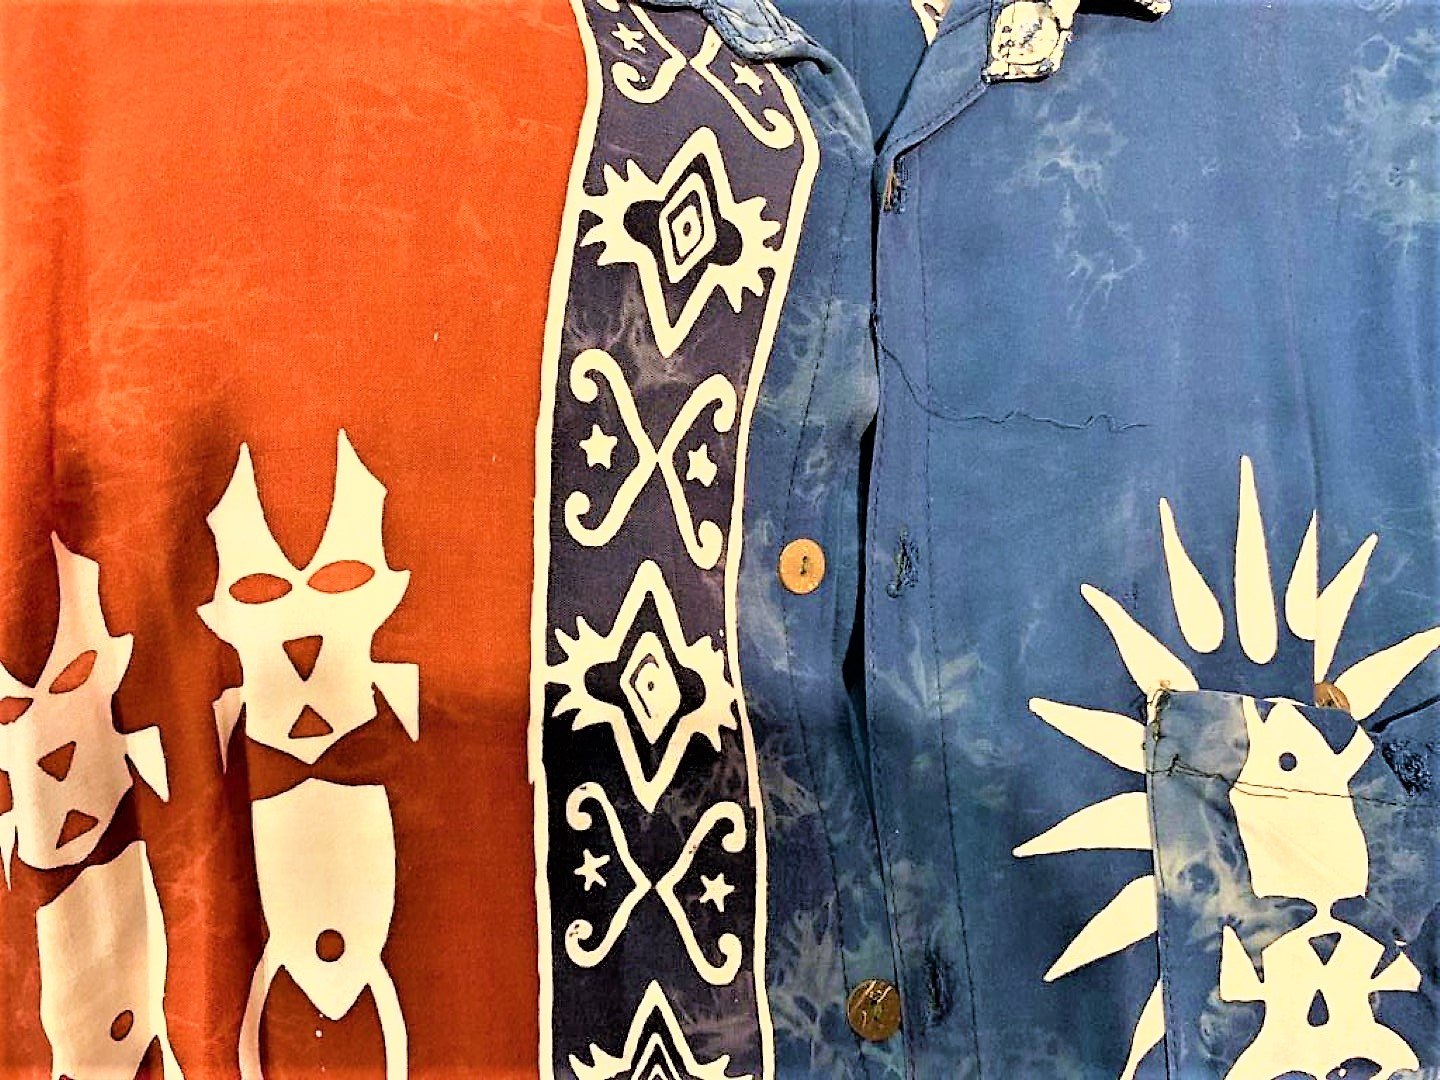
Colour Inspiration
I knew I wanted to make different masculine cards that I used to make, that is either blues & greens, black & white, or darker colours. So I took inspration from an Indonesian Batik shirt picture that my sister shared with me. Thanks, Ange!
Cohesive Card Set
I decided to step up the challenge by creating a cohesive set of cards linked by
Colour - Crisp Dye Inks from Martian Terrain, Warm Gray, and Northern Shore ink sets
Sentiment style - Main sentiments dies from Script Words Die Set, Script Words 2 Die Set, and Scripts Word 3 Die Set; and sub-sentiments from Sentiment Strips Stamp, Sentiment Strips 2 Stamp, and Sentiment Strips 3 Stamp
Stencilled backgrounds - Heart Builder Stencil, Color Block Triangle Stencil, Bubble Wrap Stencil, and Leaf Bed Stencil
Shine - Added shine with Glossy Accents, Clear Dewdrops, Embossing Ink Pad; and Crystal Clear Crisp Embossing Powder
I set out to create a bright and attractive set of masculine cards which is not complicated to make - and I think I achieved it!
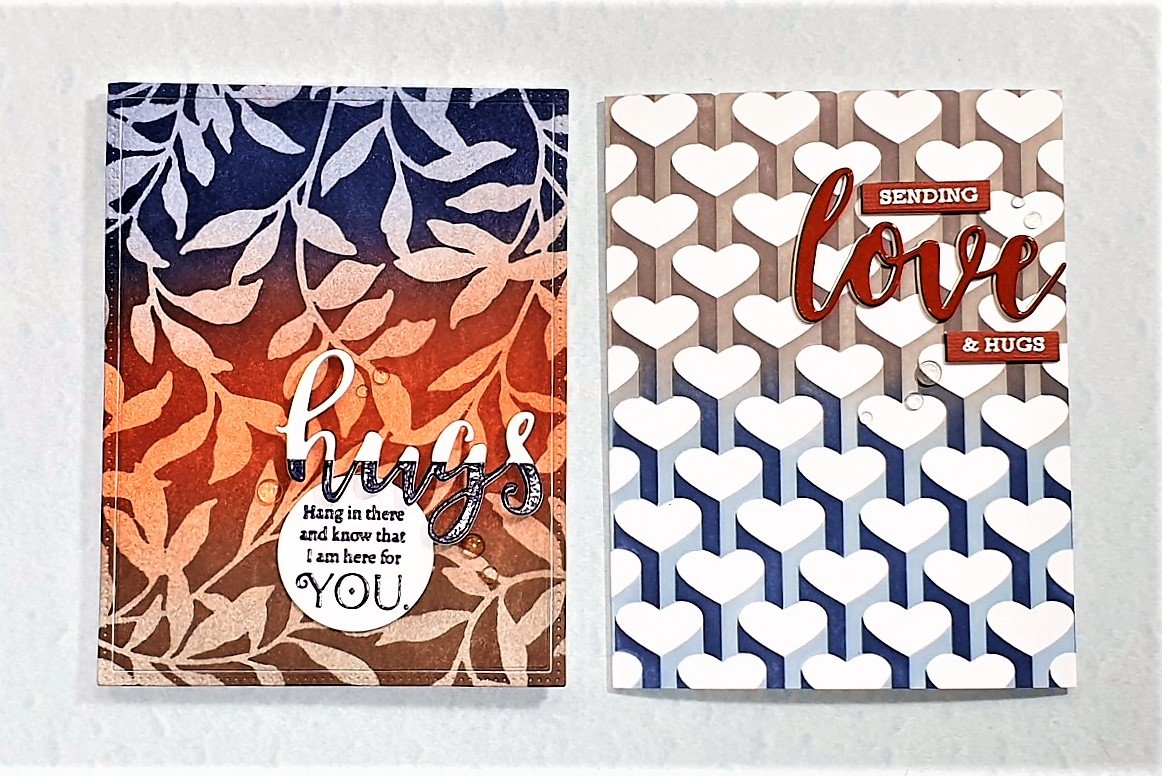
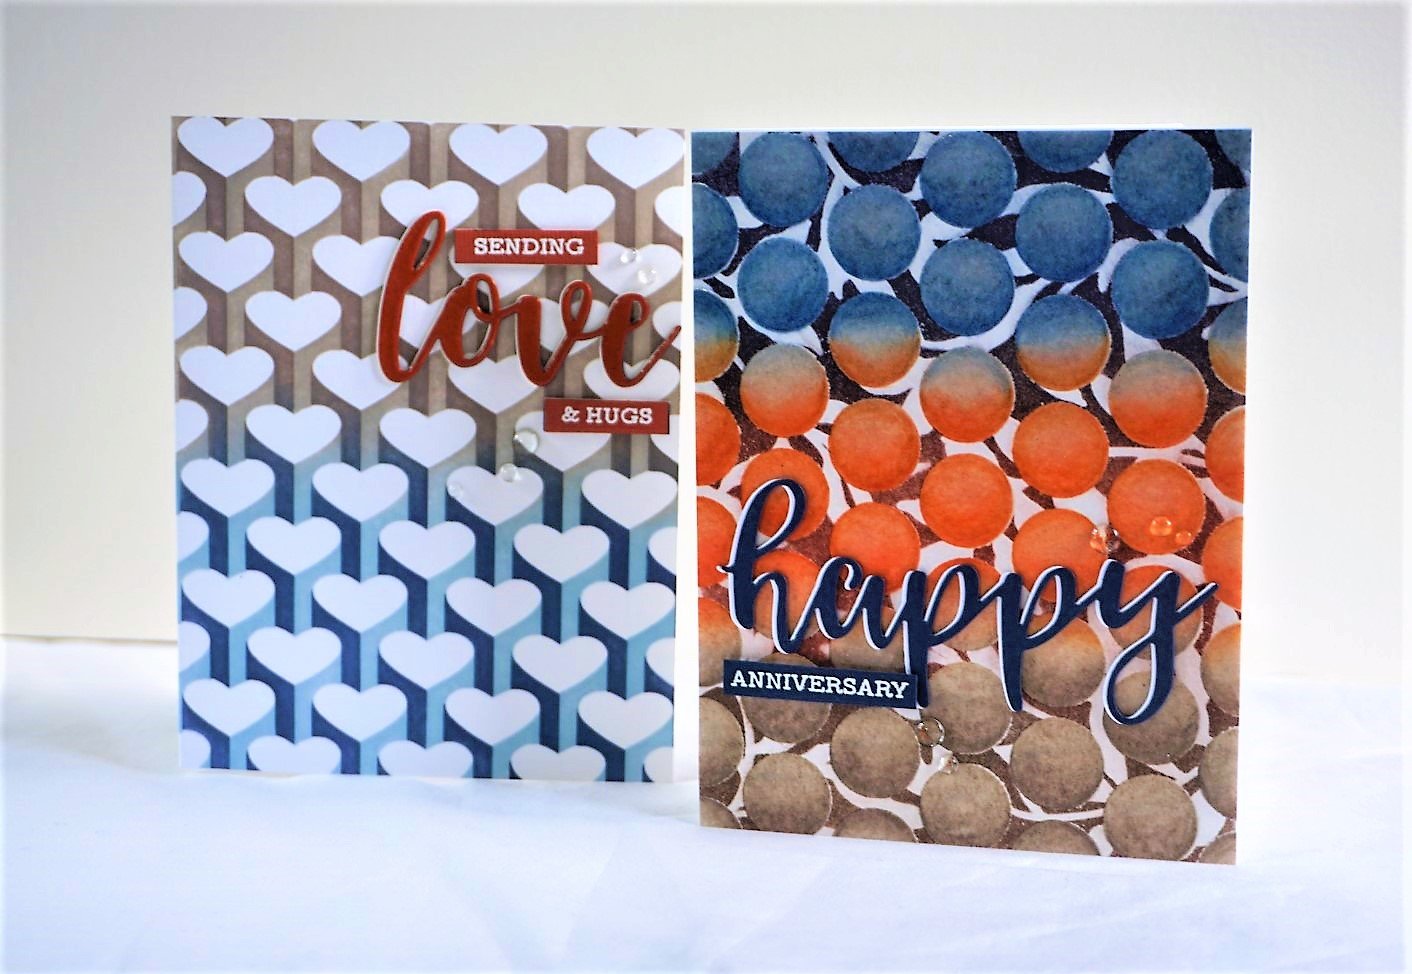
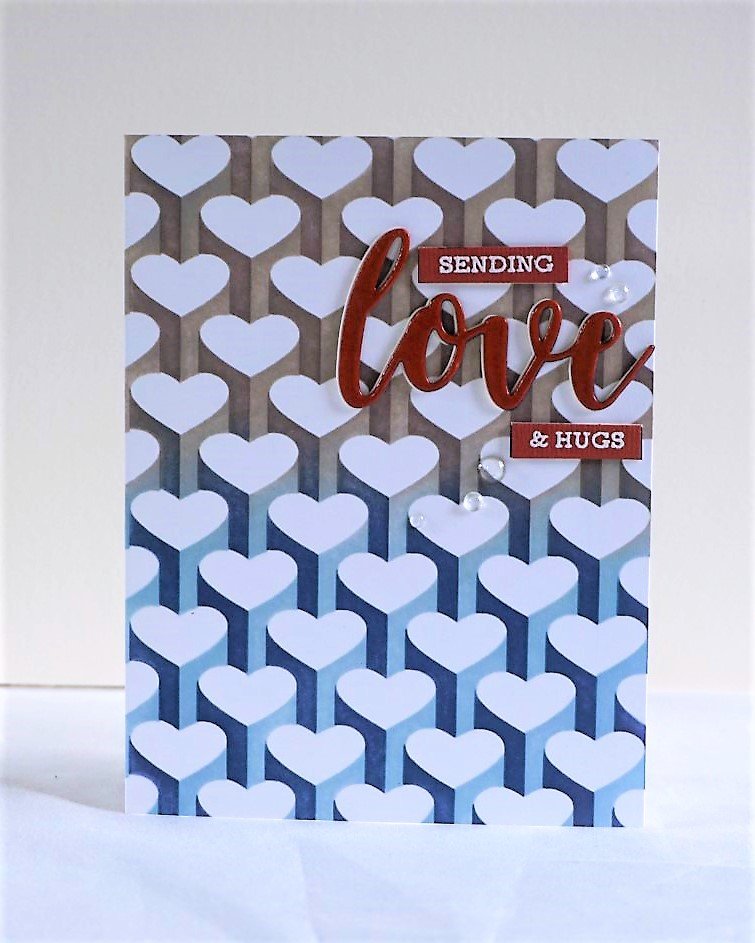
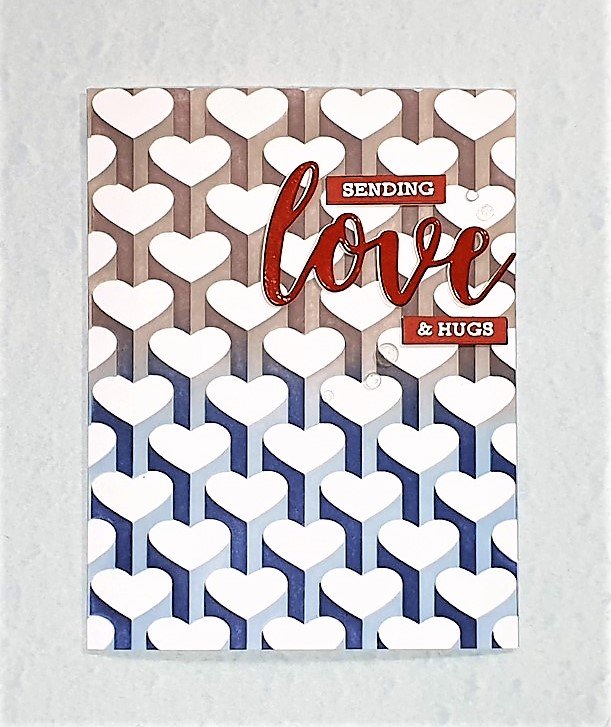
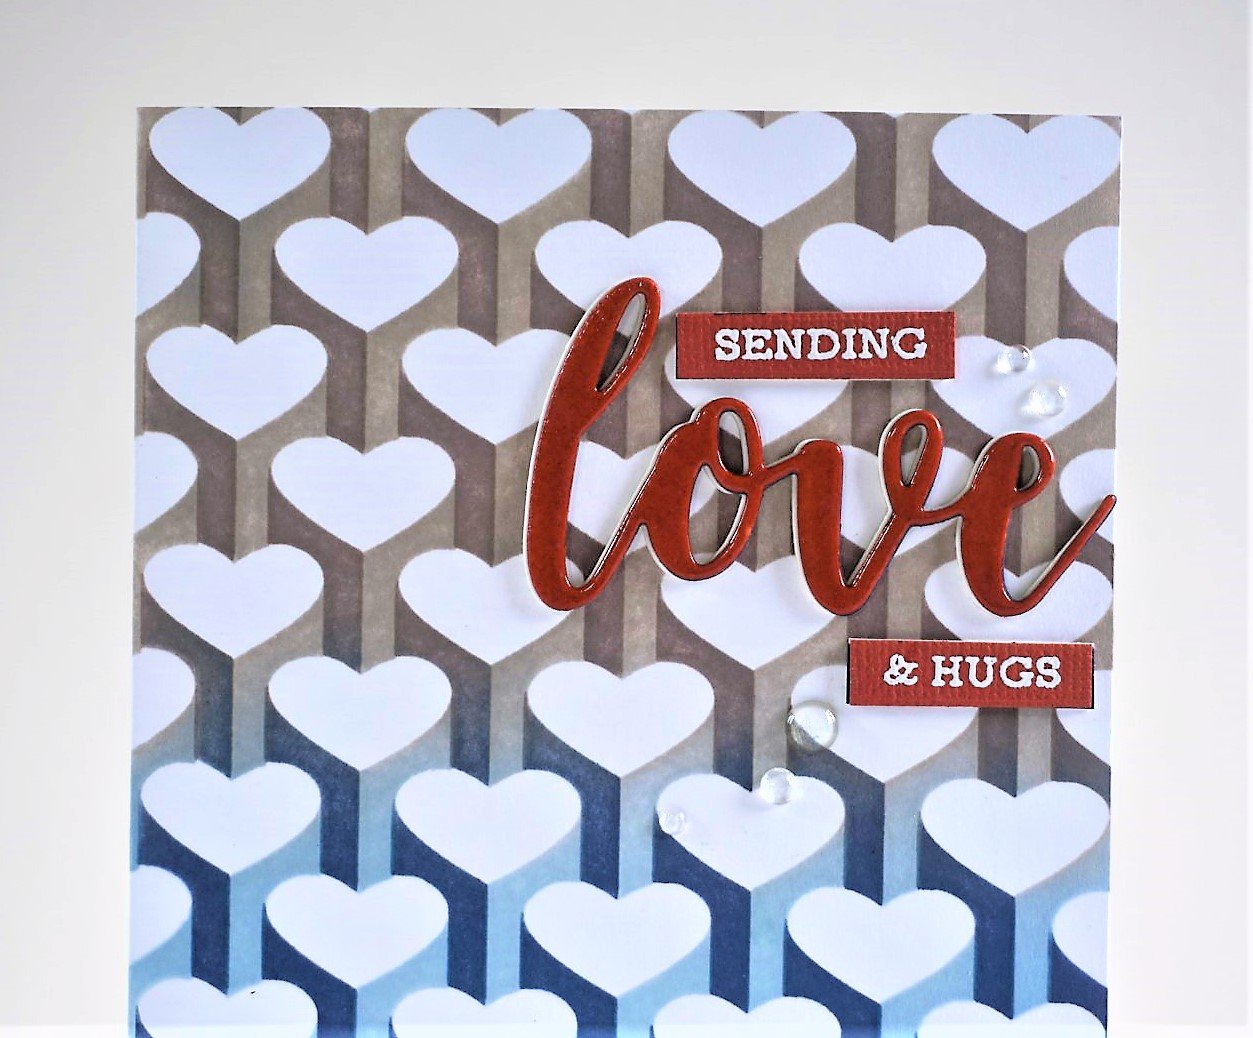
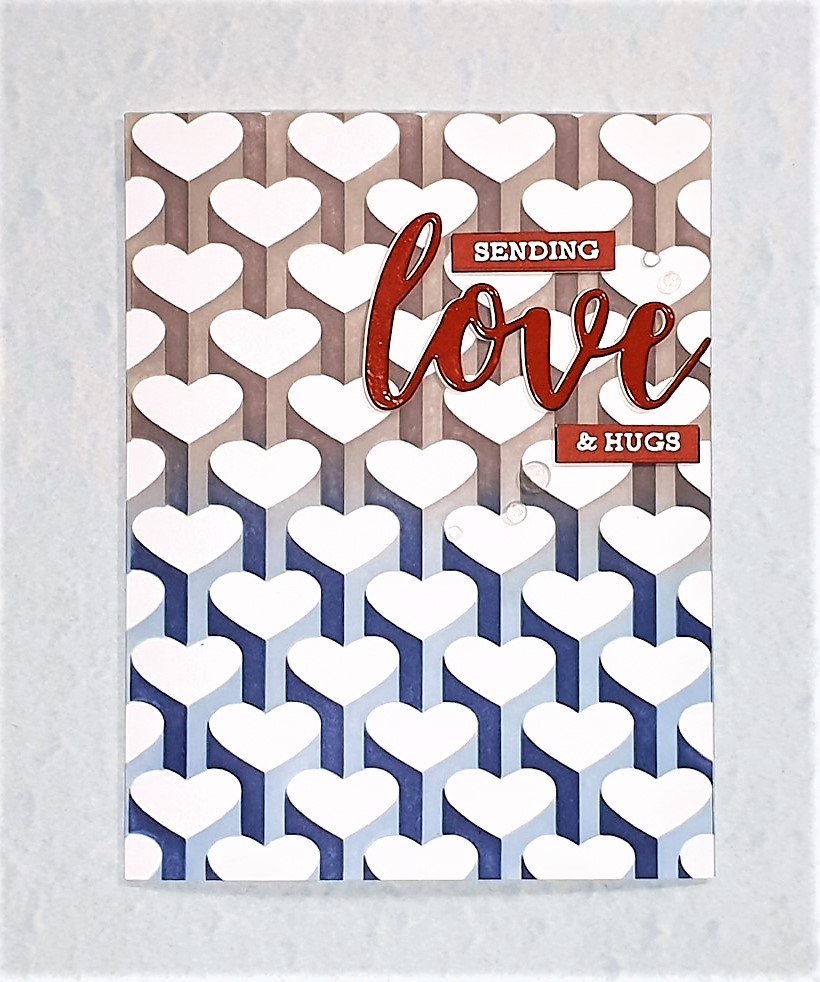
Card #1 - Love
Card Inspiration:
I attended many online classes in my AECP Level 1 and Level 2 journey and I pick components from the following three online classes for Card #1:
Easy Ink Blending Techniques - Seamless transition of colour blend
In the Mood for Color - Red for love, passion & energy; Blue for calm & tranquility; and finally warm gray signifies compromise, neutral, control, and being practical.
Of course there are ink blending and stencilling techniques employed as well.
Products Used:
Pixie Spray - Repositionable Adhesive
Make Art Stay-tion -magnetic base to hold stencil in place while inking
Crisp Dye Ink - Evening Gray, Lava Rock, Icy Water, Arctic Mountain, Canyon Clay, Mahogany Bark
Script Words Die Set - ‘love’
Crystal Clear Crisp Embossing Powder
Pure White Crisp Embossing Powder
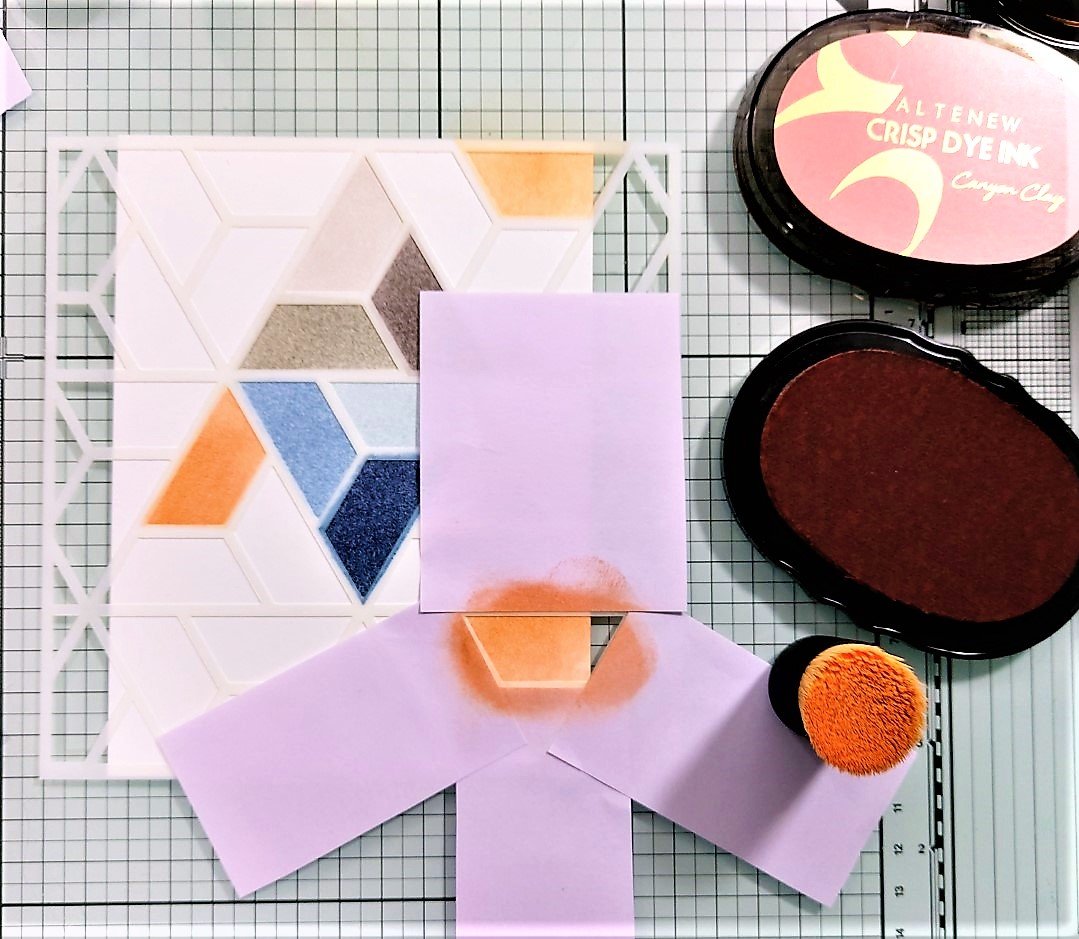
Technique Tip:
This tecnique is about making sentiments and phrases from stamps. You do not need the exact sentiment, but can mix and match.
For this card, I take the ‘sending’ from ‘sending you sweet birthday wishes’ from Sentiment Strips Stamp. For the ‘& hugs’, I add the ‘&’ next to the ‘hugs’ after stamping the ‘hugs’. See steps below with numbered pictures.

Identify ‘&’ from ‘Always & Forever’ to be added to ‘hugs’
Stamp ‘hugs’
Align the ‘&’ from ‘Always & Forever’ to be added to ‘hugs’. Using a stamping platform helps.
Tape off (cello tape or washi tape) the elements of the stamp that you do not want to stamp, in this case, ‘always’ and ‘forever’, thus leaving the ampersand, ‘&’ untaped for inking.

5. Ink the ‘&’
6. Remove tape
7. Close stamping platform door to stamp ‘&’
8. ‘& hugs’ achieved!
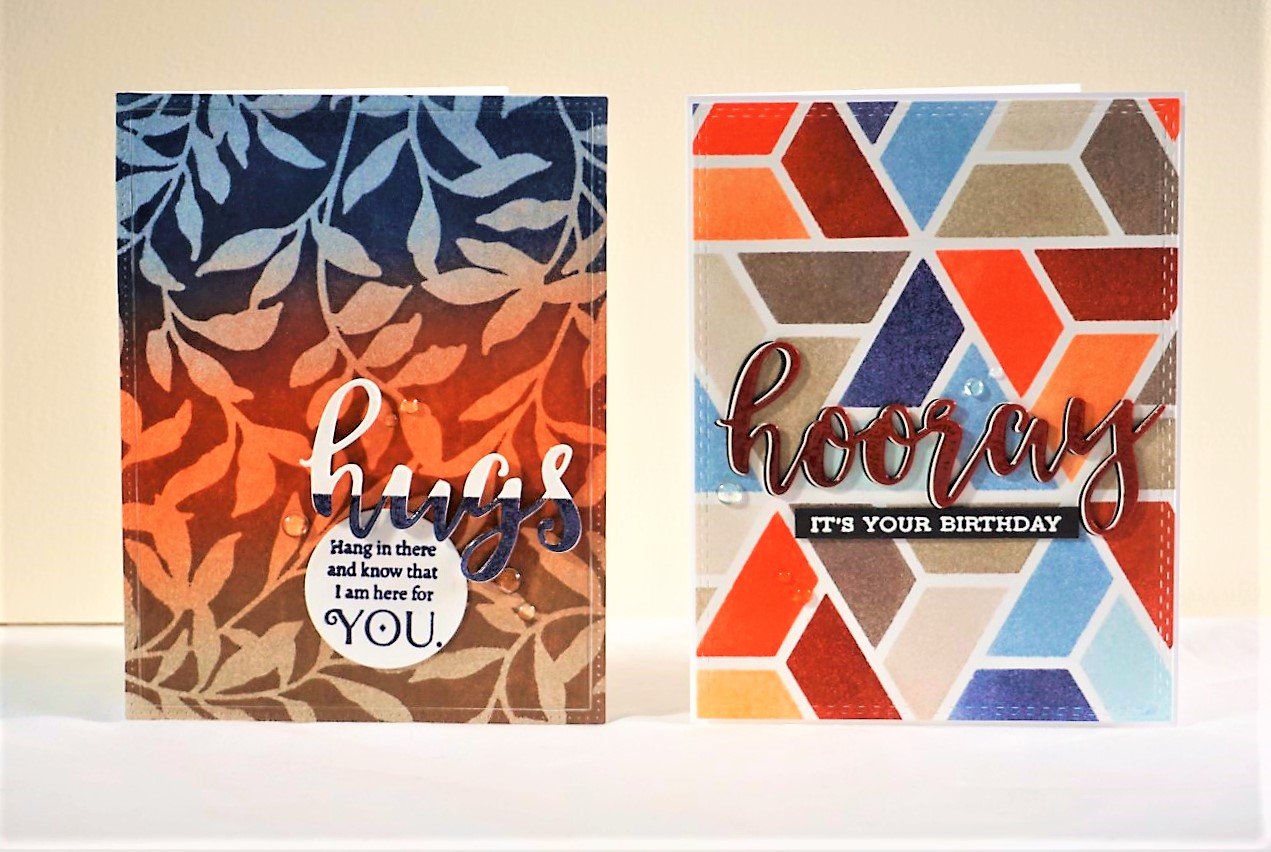
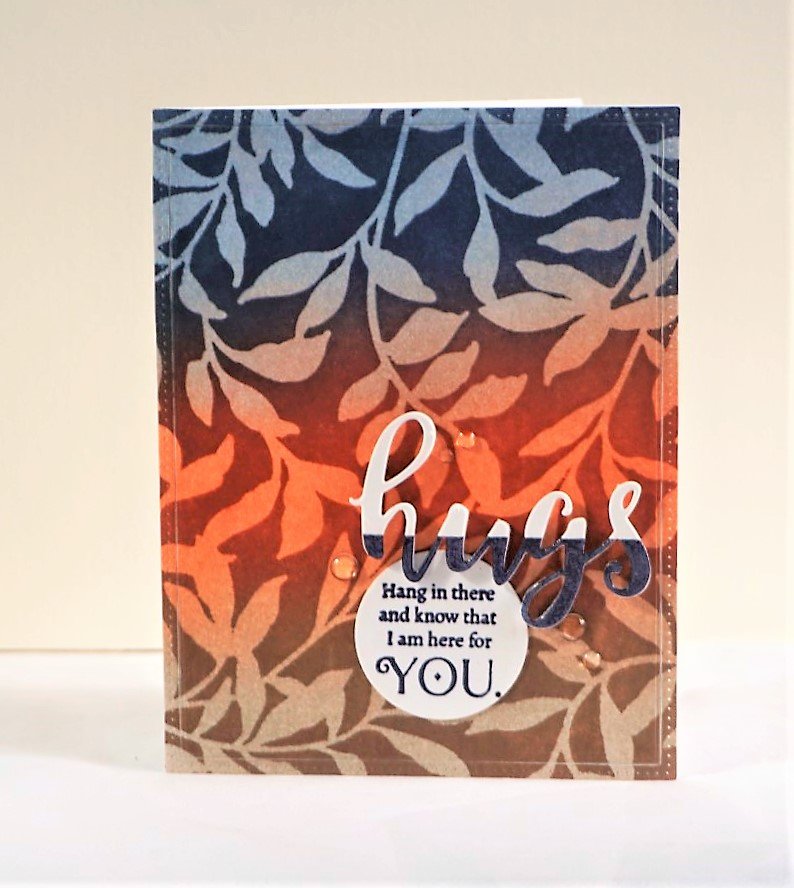
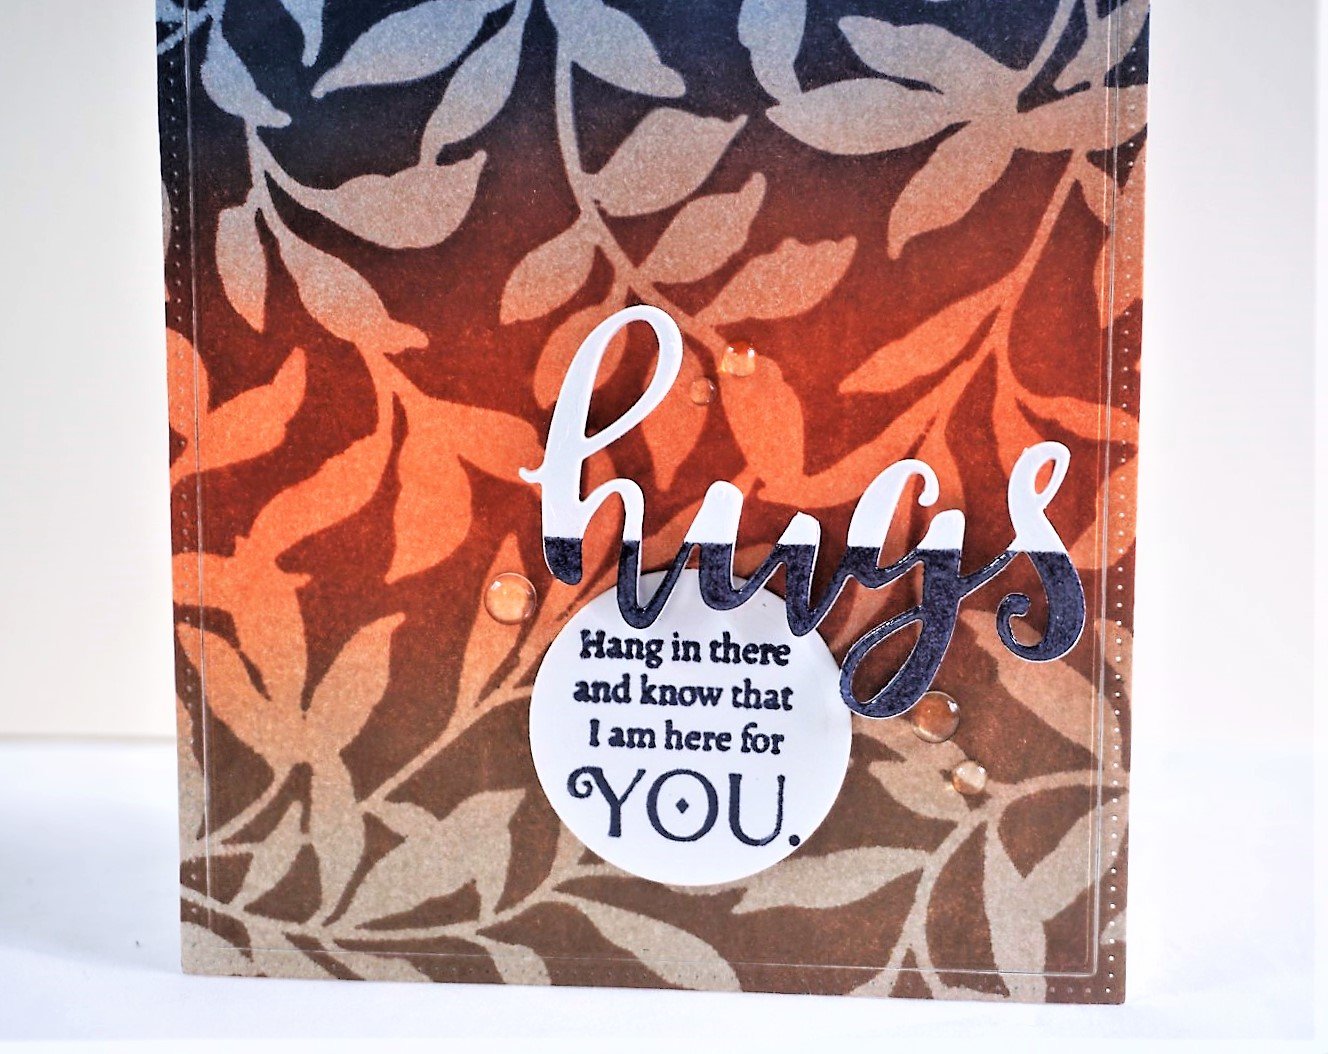
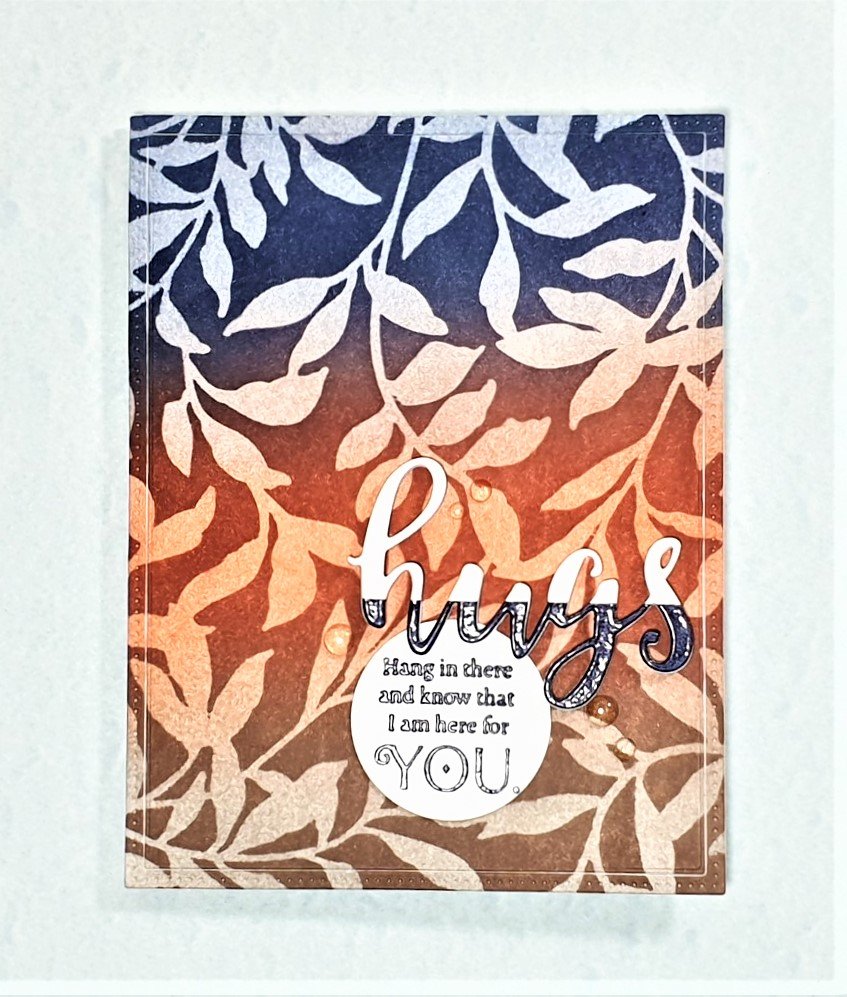
Card #2 - Hugs (Encouragement)


Card Inspiration:
Easy Ink Blending Techniques - Seamless transition of colour blend
In the Mood for Color - Red for love, passion & energy; Blue for calm & tranquility; and finally warm gray signifies compromise, neutral, control, and being practical.
Of course there are ink blending and stencilling techniques employed as well.
Products Used:
Pixie Spray - Repositionable Adhesive
Make Art Stay-tion -magnetic base to hold stencil in place while inking
Crisp Dye Ink - Evening Gray, Lava Rock, Icy Water, Arctic Mountain, Canyon Clay, Mahogany Bark
Script Words Die Set - ‘hugs’
Monsteras and Quotes Stamp Set
Crystal Clear Crisp Embossing Powder
Technique Tip:
This technique shows how to get more from your die cut sentiments. See steps below with numbered pictures.
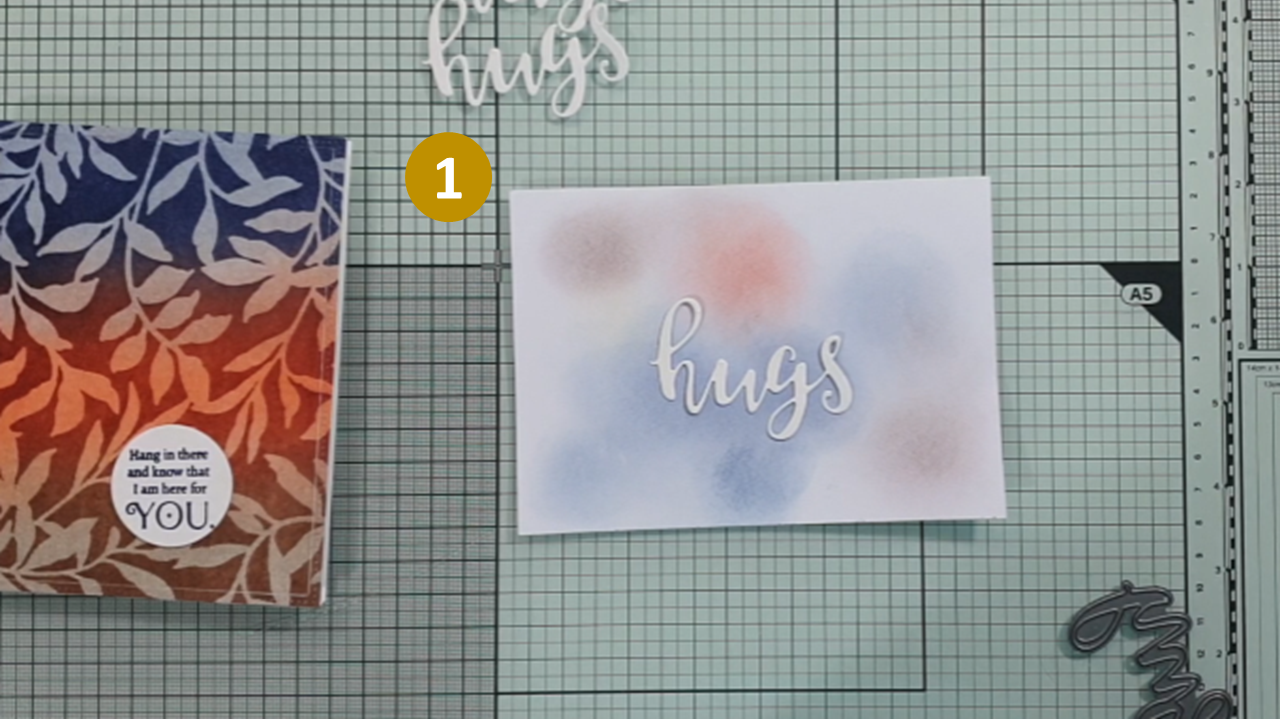
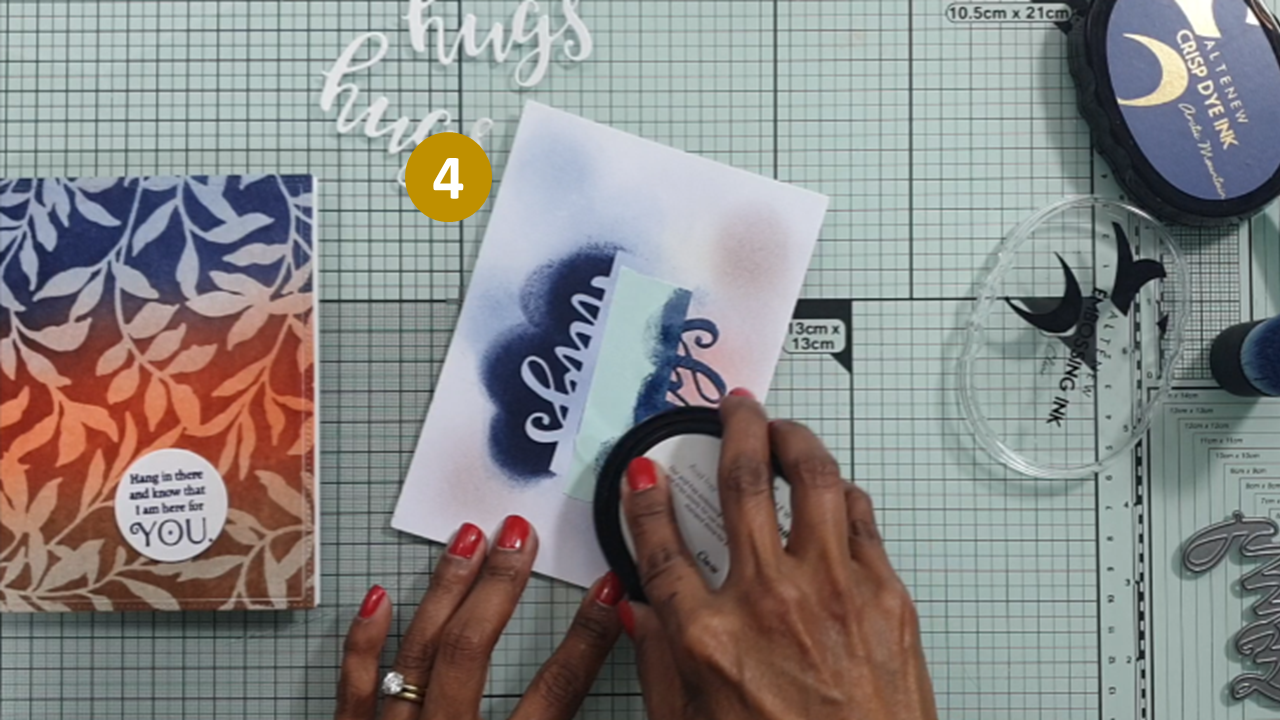
Die cut sentiment with thick cardstock
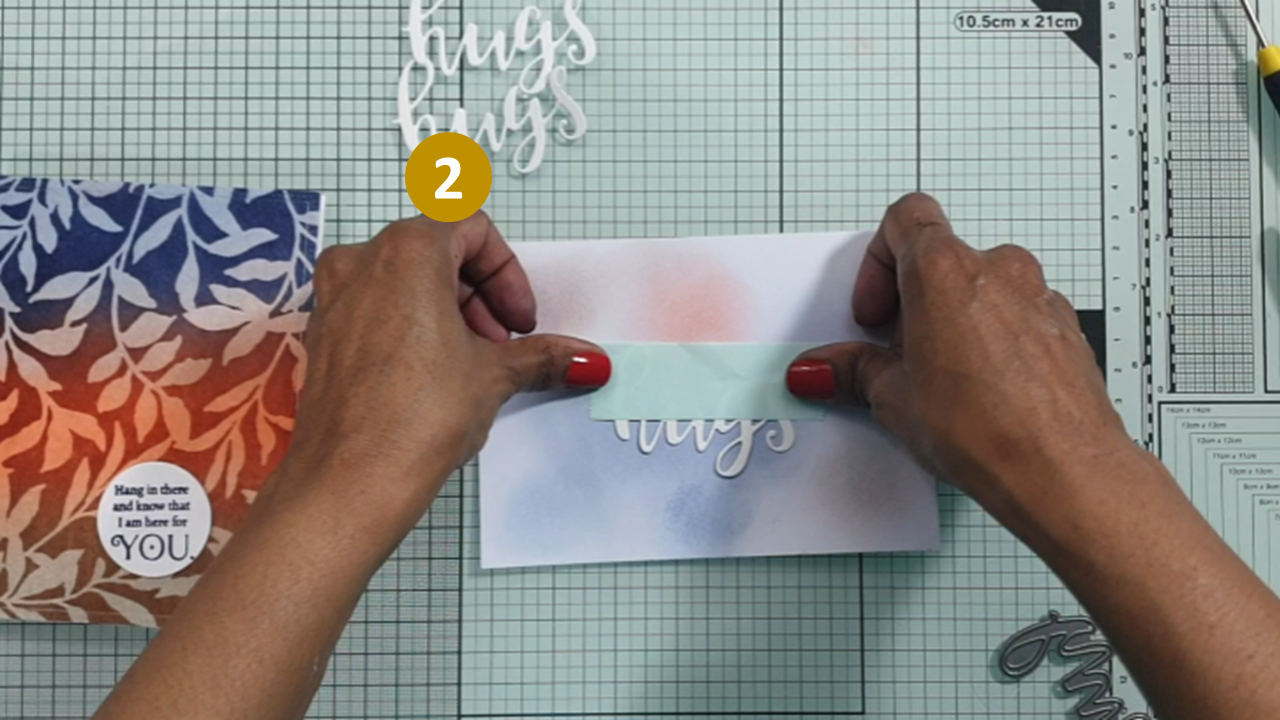
Adhere mint tape (repositionable low tack tape) to top half of die cut sentiment
Ink lower half of die cut sentiment with dye ink using small blending brush
Ink lower half of inked die cut sentiment with embossing ink pad

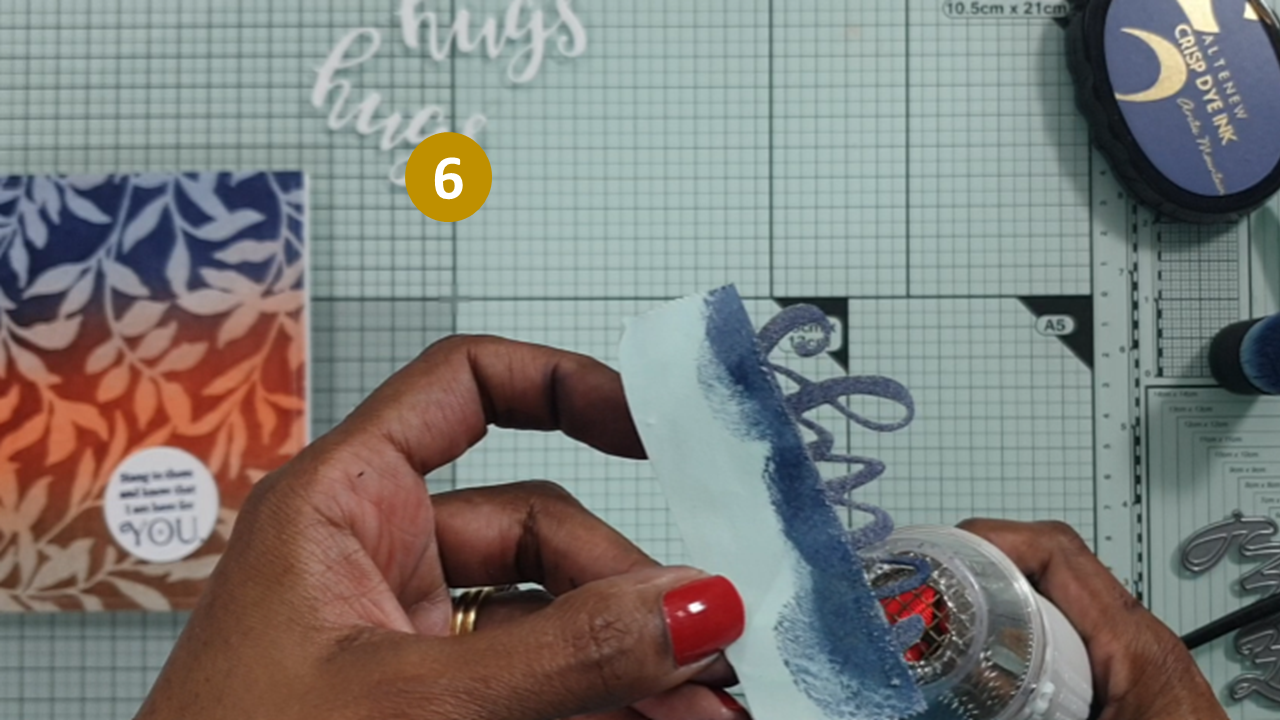
5. Sprinkle Crystal Clear Crisp Embossing Powder onto lower half of die cut sentiment
6. Melt embossing powder with heat tool
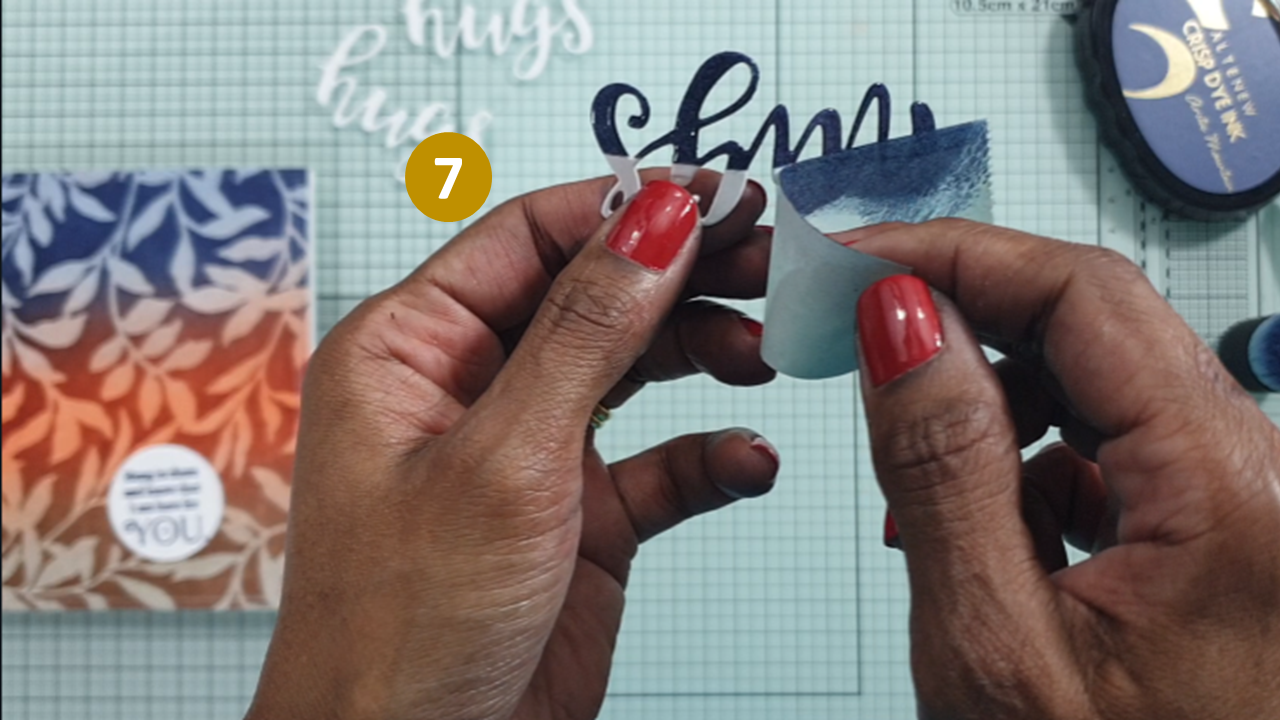
7. Gently remove mint tape
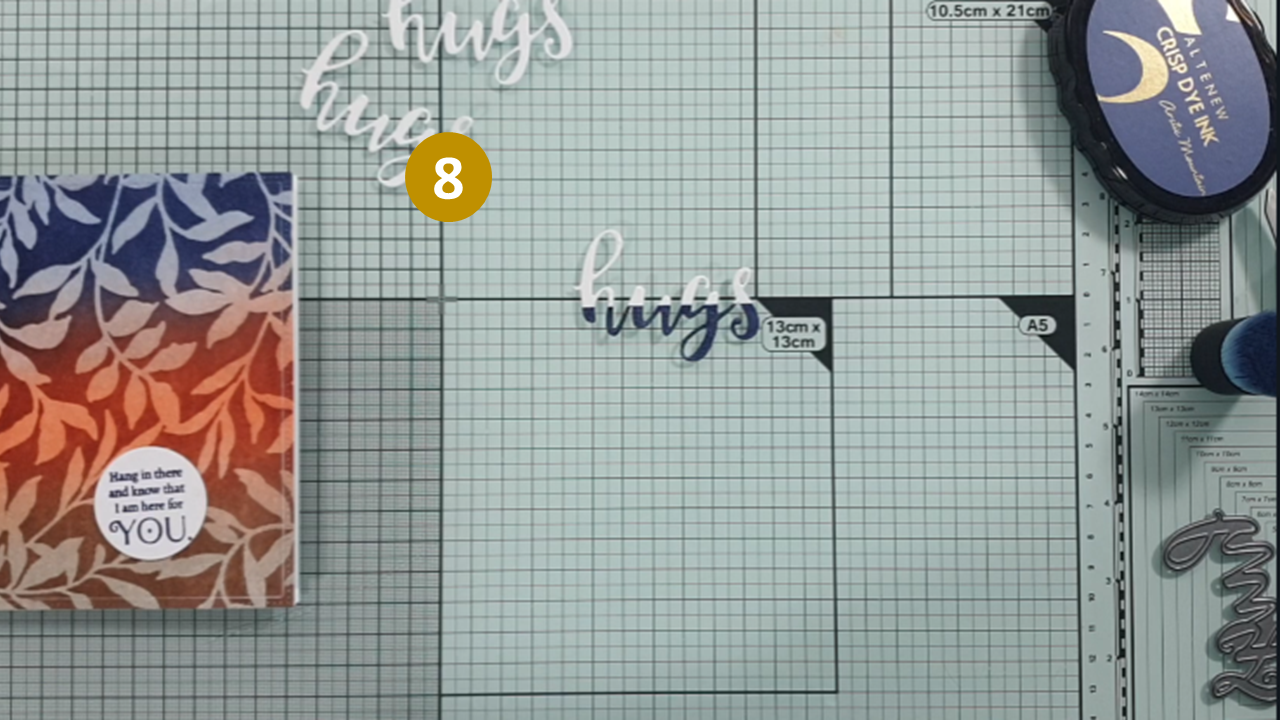
8. Voila…completed die cut sentiment with shine on lower half. All to do now is add a couple more die cut layers to back of completed die cut sentiment and it’s ready for card front.
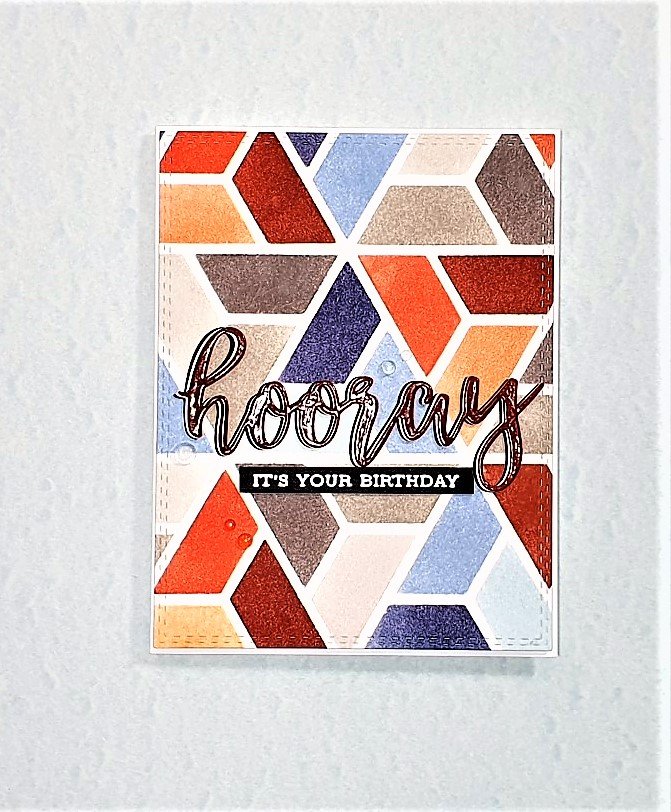
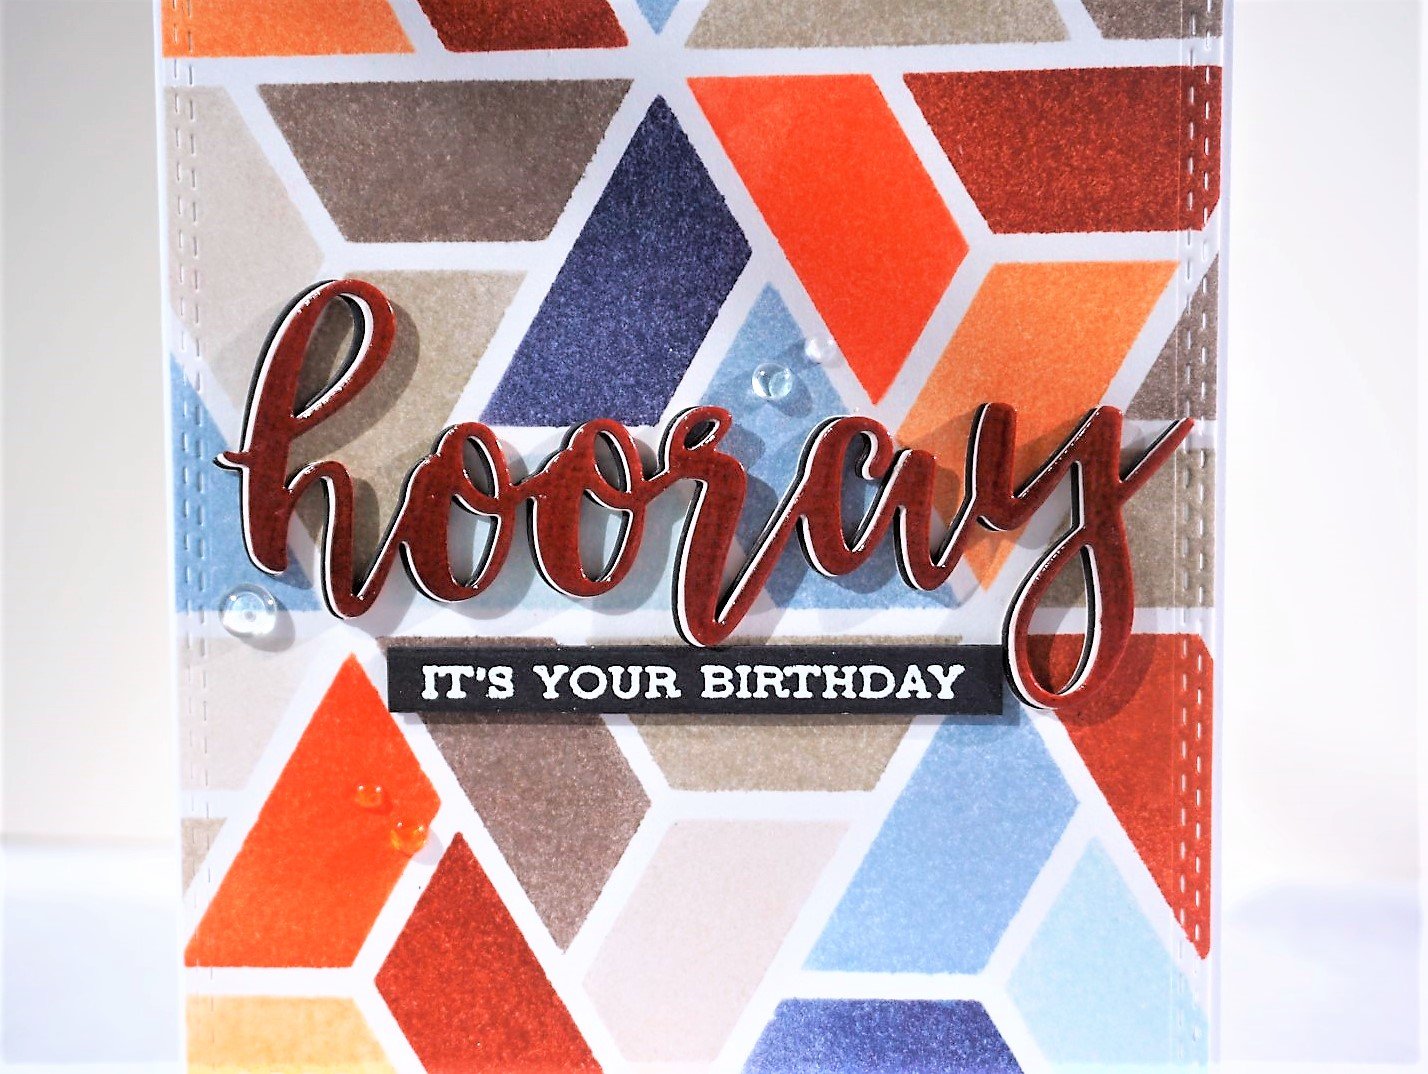
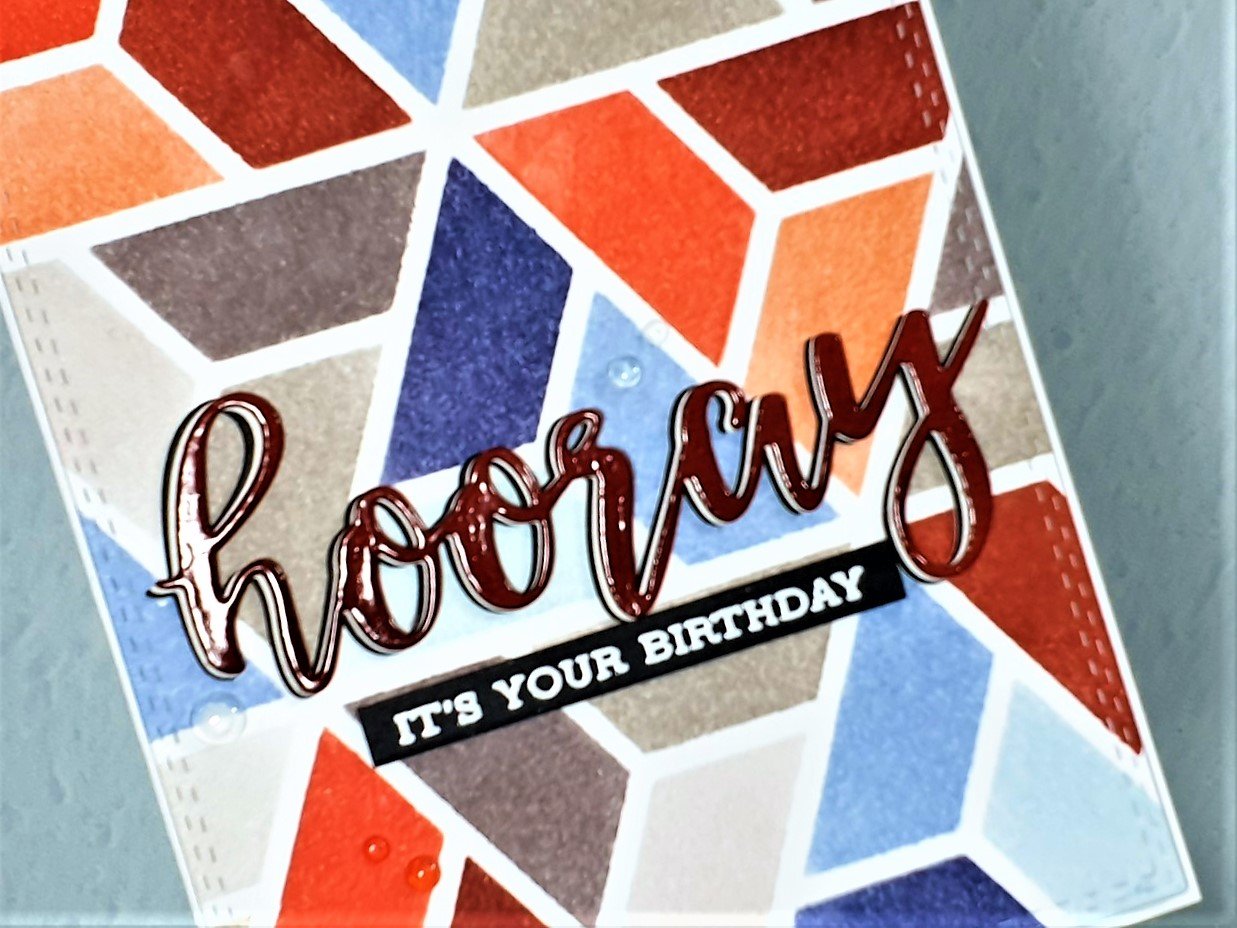
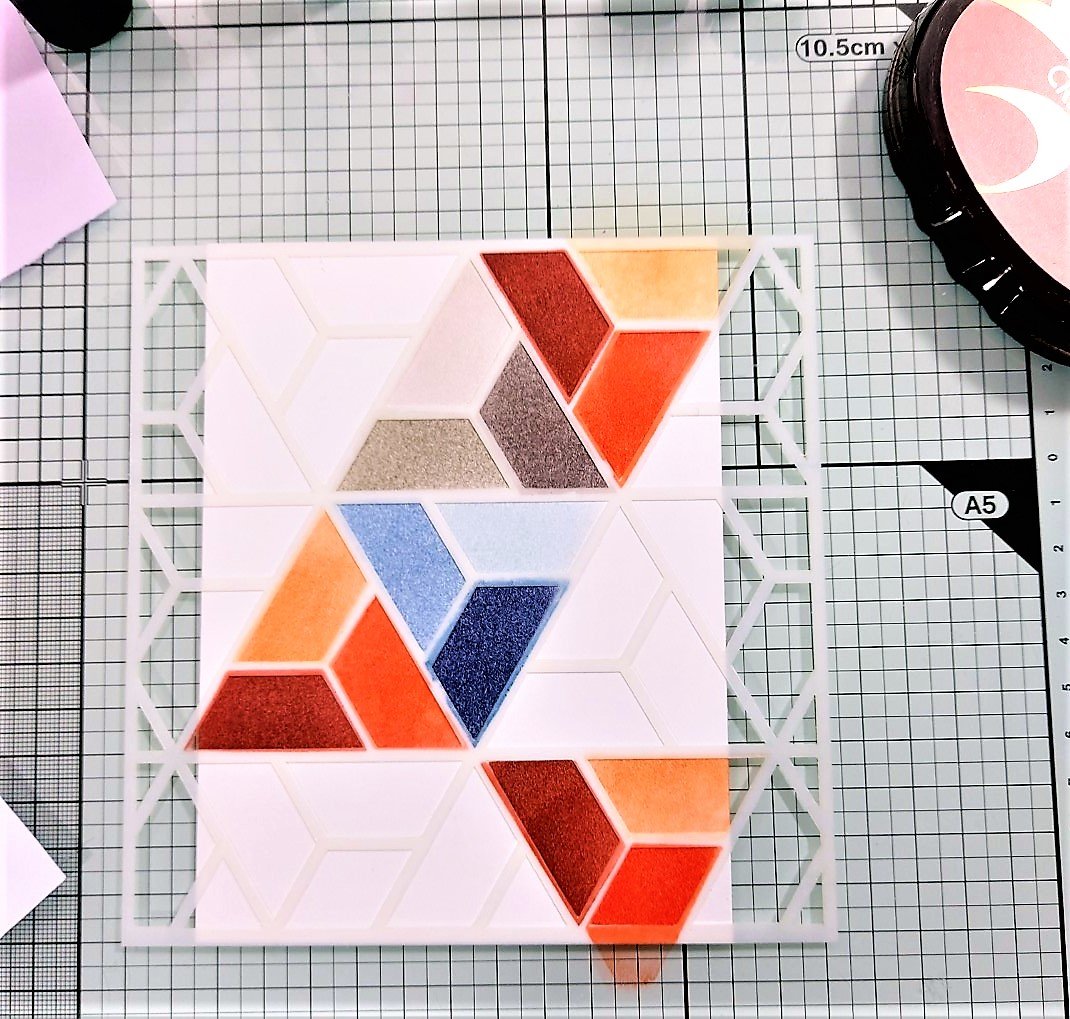
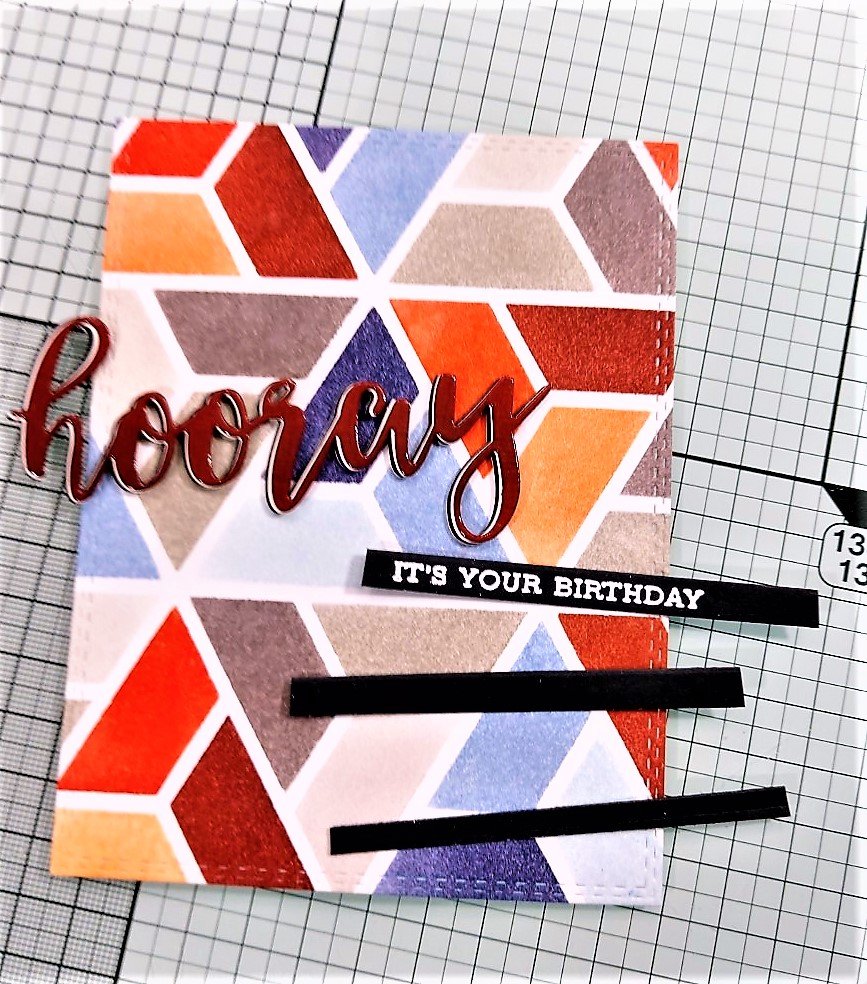
Card #3 - Hooray (Birthday)
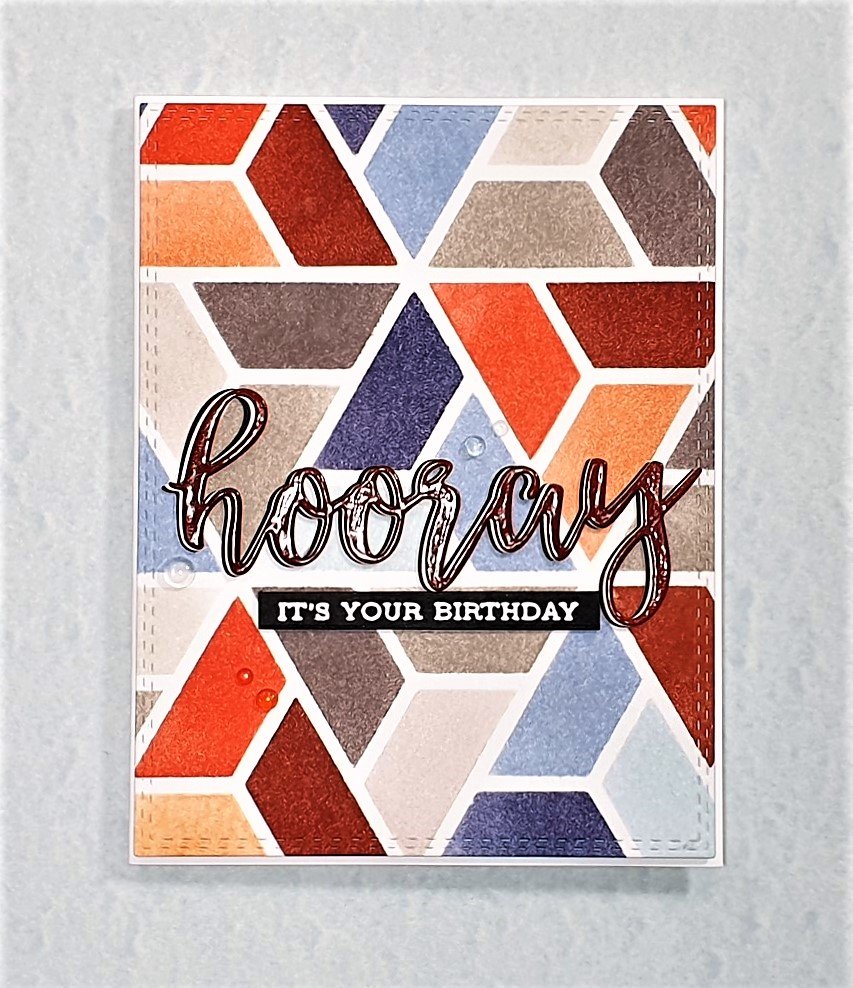
Card Inspiration:
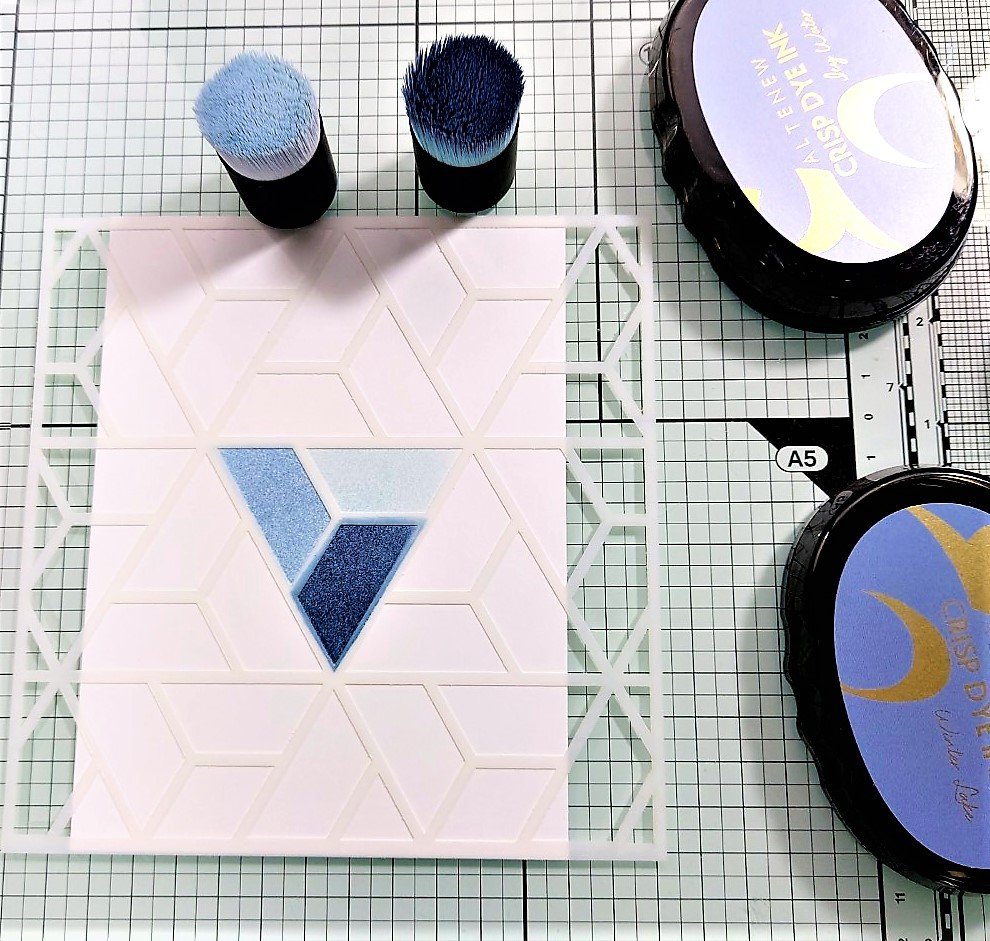
Easy Ink Blending Techniques - Seamless transition of colour blend
In the Mood for Color - Red for love, passion & energy; Blue for calm & tranquility; and finally warm gray signifies compromise, neutral, control, and being practical.
For the Guys - Geometric Designs
Of course there are ink blending and stencilling techniques employed as well.
Products Used:
Pixie Spray - Repositionable Adhesive
Make Art Stay-tion -magnetic base to hold stencil in place while inking
Crisp Dye Ink - Evening Gray, Lava Rock, Morning Frost, Polar Bear, Icy Water, Arctic Mountain, Canyon Clay, Burnt Red, Mahogany Bark
Scripts Word 3 Die Set - ‘hooray’
Sentiment Strips 2 Stamp - ‘it’s’
Sentiment Strips 3 Stamp - ‘your’ and ‘birthday’
Crystal Clear Crisp Embossing Powder
Pure White Crisp Embossing Powder
Technique Tip:
Used the same technique as employed for Card #1, ‘love’ for the sub-sentiment, ‘it’s your birthday’.

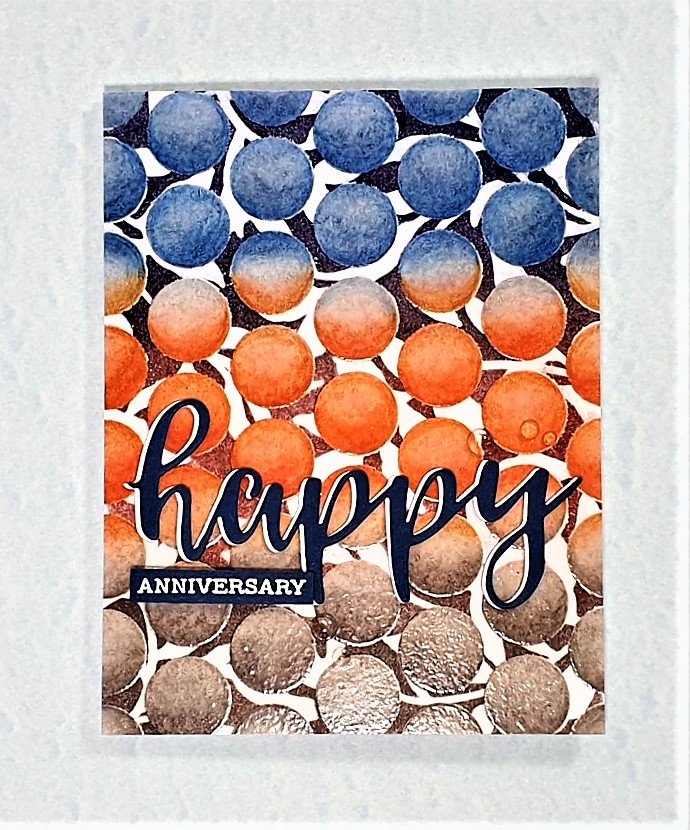
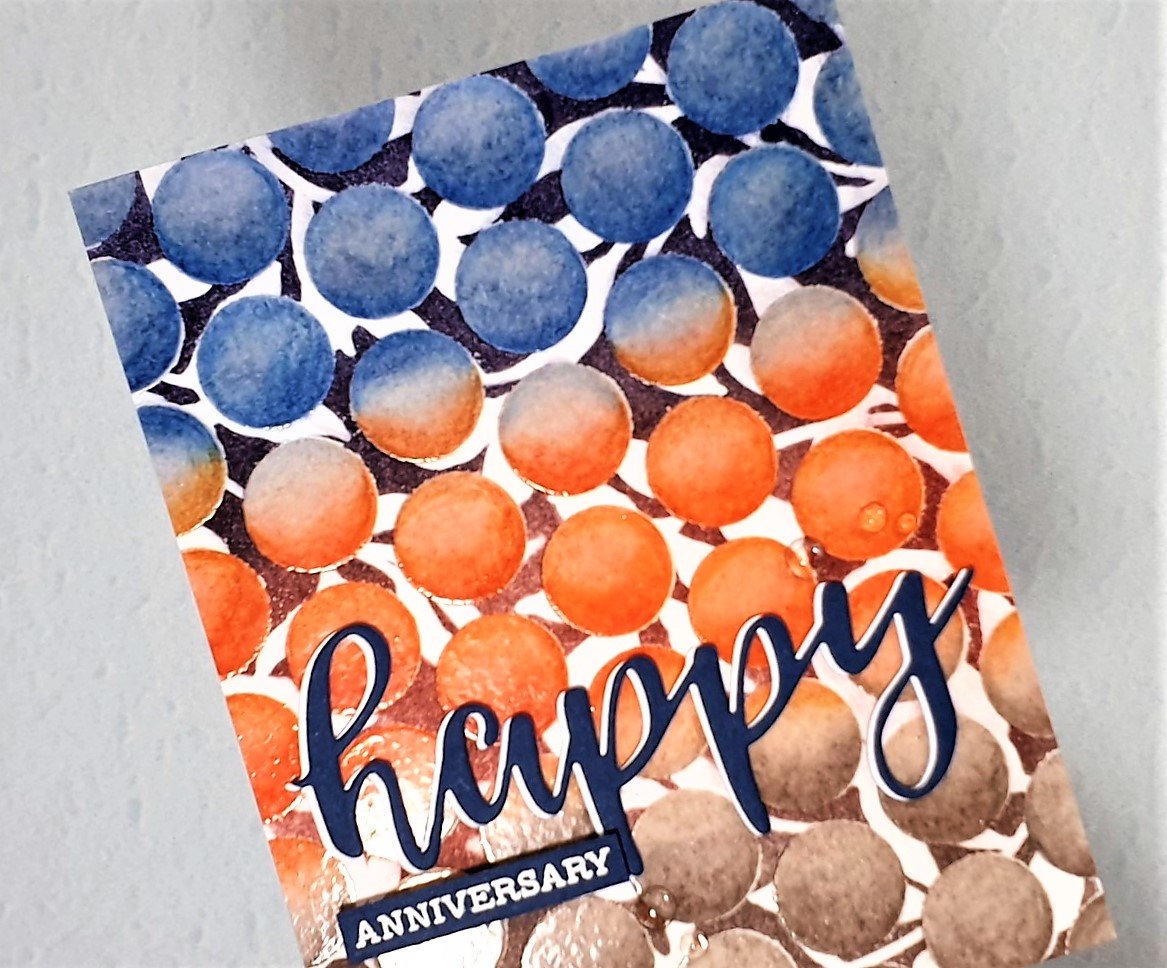
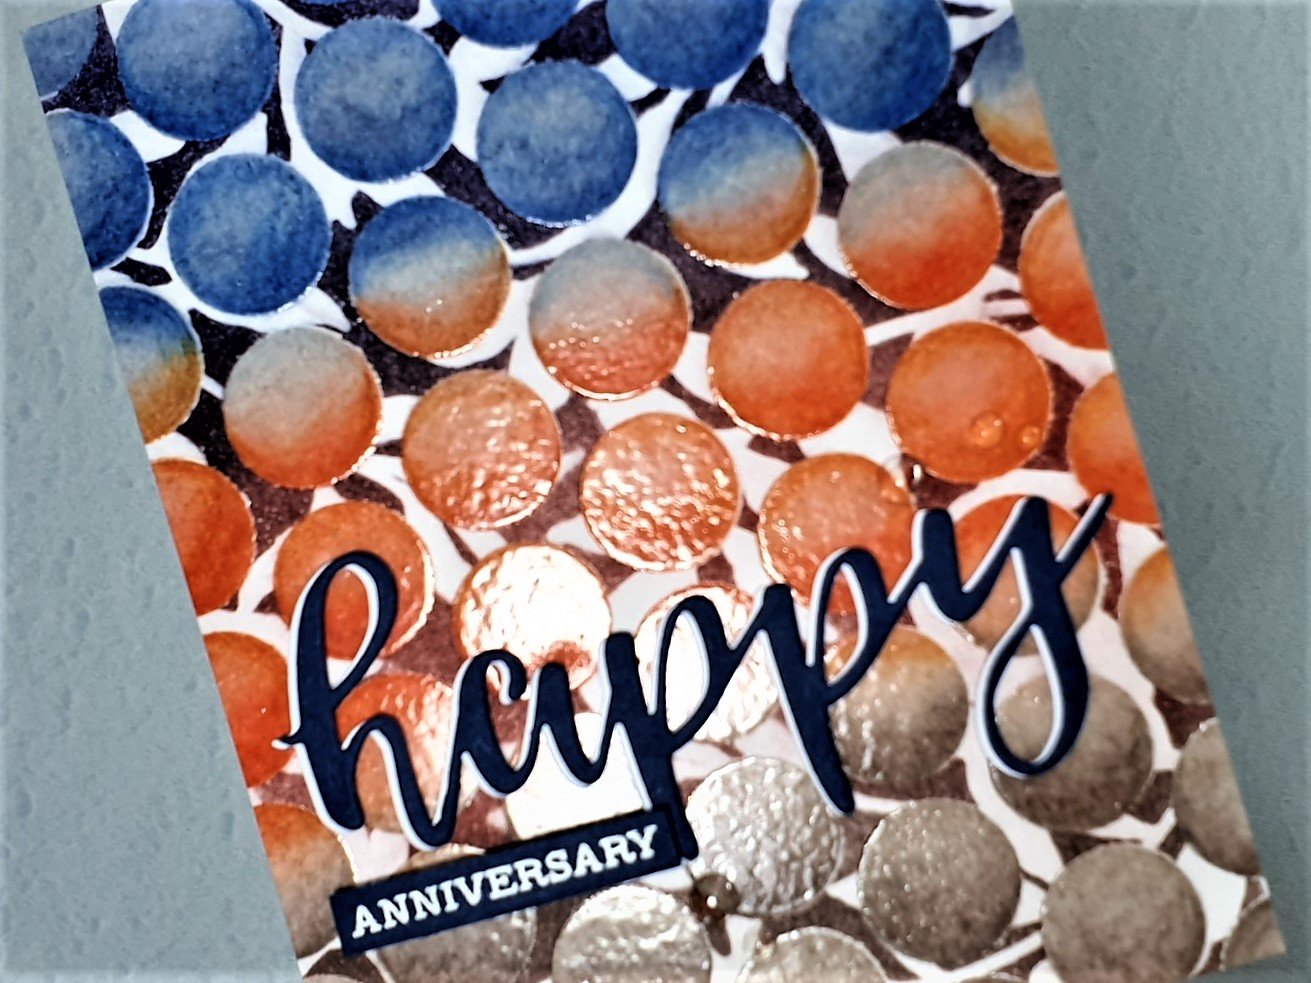
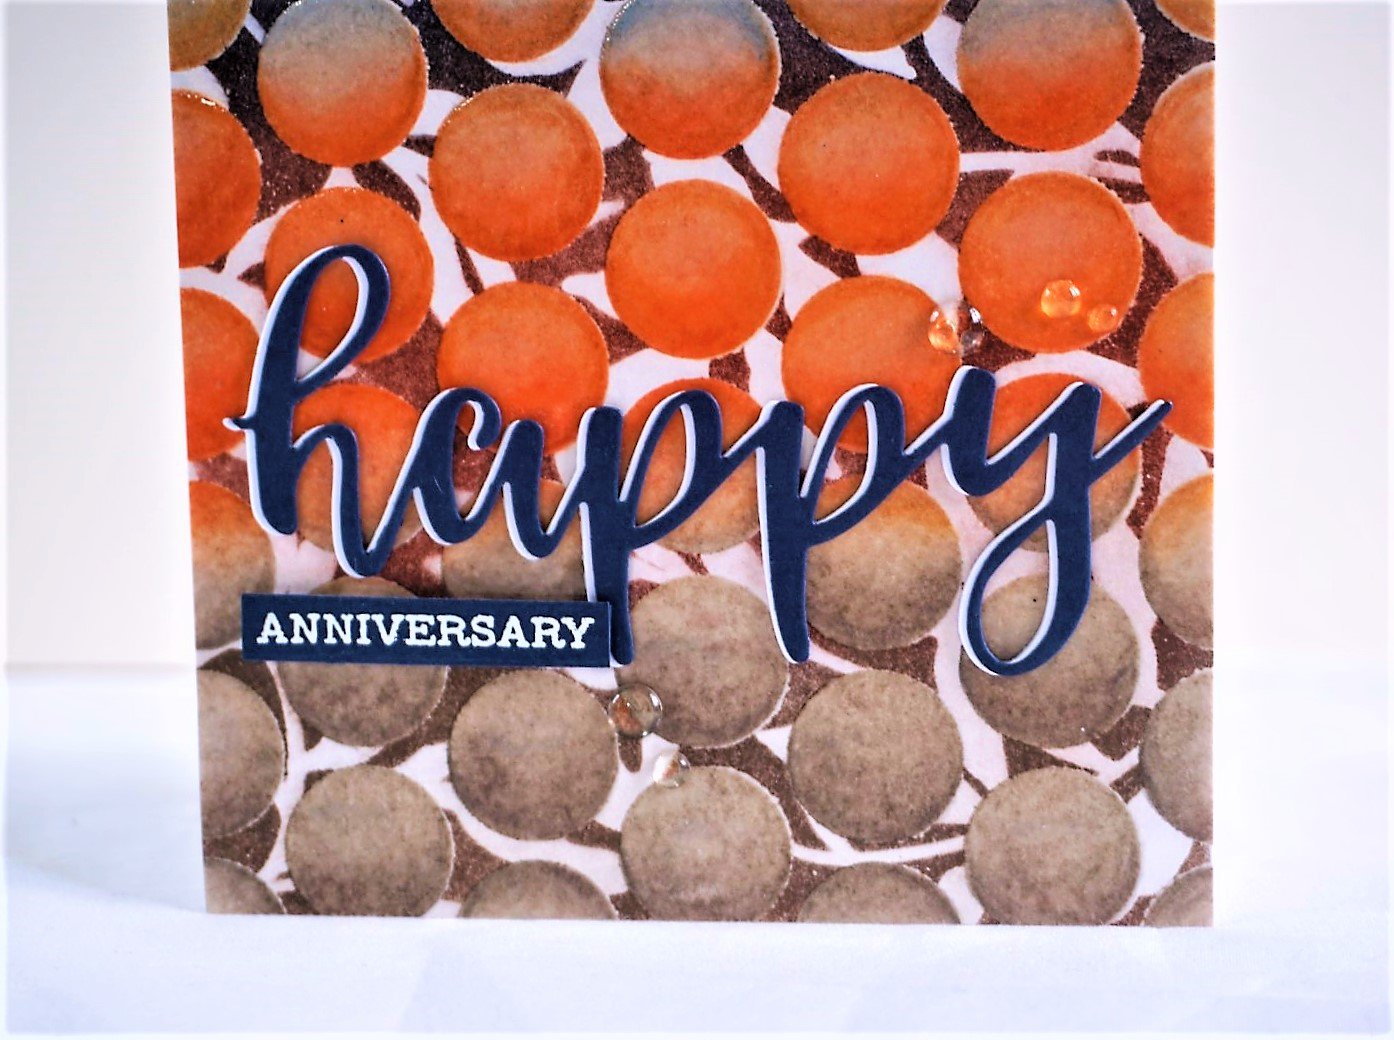
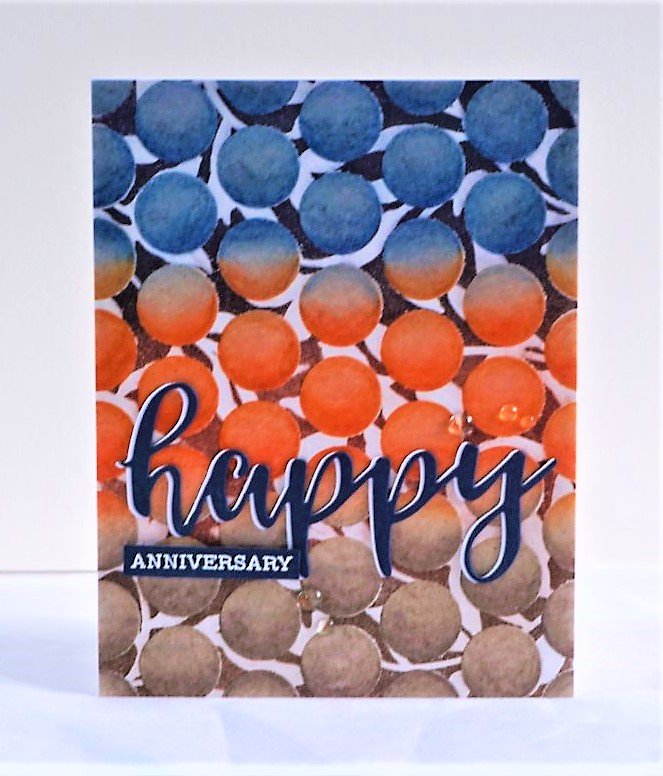
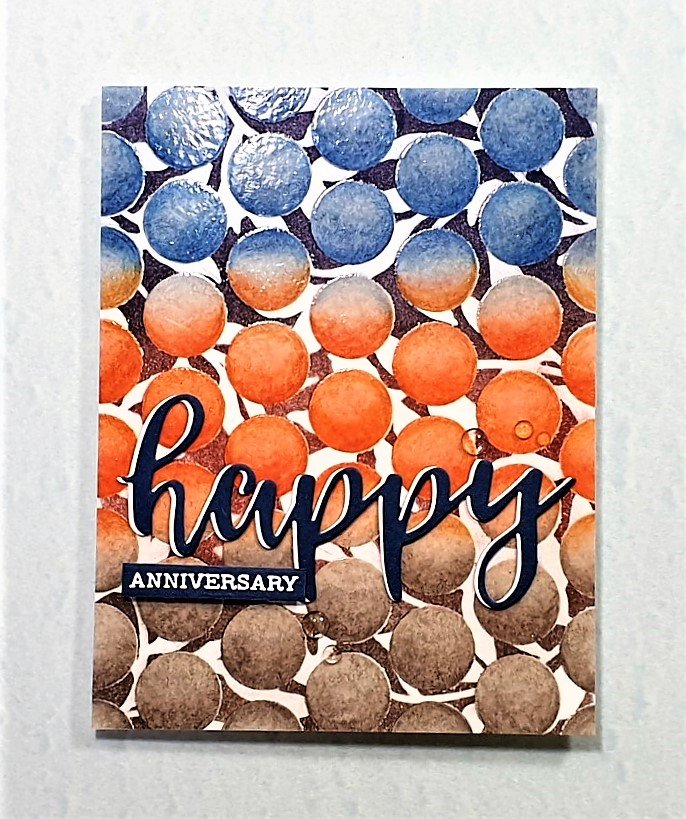
Card #4 - Happy (Anniversary)

Card Inspiration:
Easy Ink Blending Techniques - Seamless transition of colour blend
In the Mood for Color - Red for love, passion & energy; Blue for calm & tranquility; and finally warm gray signifies compromise, neutral, control, and being practical.
Beautiful Details - colour pencils over inked image
Impressive Heat Embossing - Heat embossing for a resist effect
Of course there are ink blending and stencilling techniques employed as well.
Products Used:
Pixie Spray - Repositionable Adhesive
Make Art Stay-tion -magnetic base to hold stencil in place while inking
Crisp Dye Ink - Evening Gray, Moon Rock, Icy Water, Winter Lake, Canyon Clay, Burnt Red
Prismacolor Pencils - PC1023 Cloud Blue, PC1024 Blue Slate, PC1022 Mediterranean Blue, PC1101 Denim Blue, PC1032 Pumpkin Orange, PC921 Pale Vermillion, PC1001 Salmon Pink, PC927 Light Peach, PC1074 70% French Grey, PC1072 50%French Grey, PC1070 30% French Grey
Script Words 2 Die Set - ‘happy’
Crystal Clear Crisp Embossing Powder
Pure White Crisp Embossing Powder
Technique Tip:
This tecnique is adding detail with colour pencils. While I add detail after inking, you can also add detail with colour pencils after using watercolour paints or alcohol markers.

Adding colour with colour pencils after some light ink blending.
Other Products Used:
Pixie Spray - Repositionable Adhesive
Make Art Stay-tion -magnetic base to hold stencil
Mint tape - repositionable low tack tape
Crafter's Companion Gemini Junior Die-Cutting and Embossing Machine
Tonic Studios Tim Holtz - 8.5 Inch Comfort Trimmer
Double Sided Adhesive Foam Sheets - 4.25 x 5.5 inches - 5 Sheets


COMPLETE AECP LEVEL 2 FINAL CHALLENGE SUBMISSION
For Part 1, Altered Item Project, I created a DIY storage solution for Altenew Watercolor Brush Markers that you see in the above picture, please see here.
If you are still reading this post -a massive thank you. Thanks so much for stopping by and do leave me a comment below if you have a query, comment, observation, or just want to say hi!