

Embossing folder techniques and Simple Coloring Stencils


Disclosure: Where available I use compensated affiliate links which means if you make a purchase, I receive a small commission at no extra cost to you. Thank you so much for your support!
This post which includes a video shows how I use Altenew’s Courageous You Bundle and Sunshine Blooms 3D Embossing Folder to create five cards - all with different techniques employed.
I also use these cards to participate in Altenew’s Inspiration Challenge June 2023. These monthly challenges are guided by colours and this month’s colour are as per the picture below.

Check out video below.
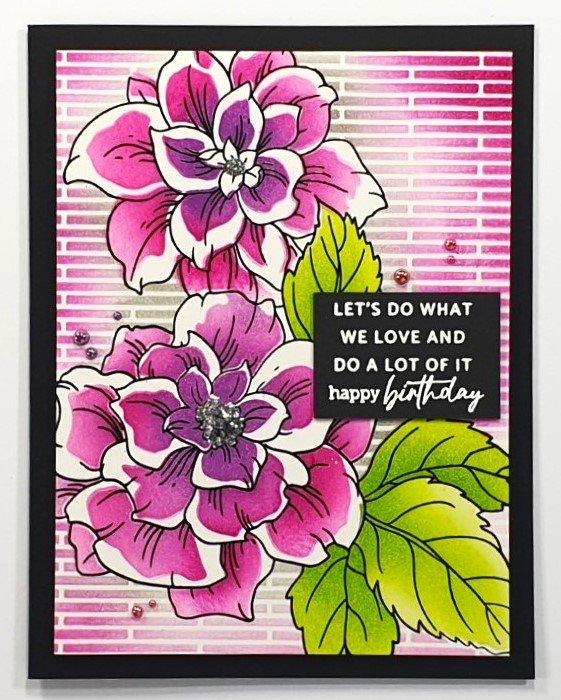
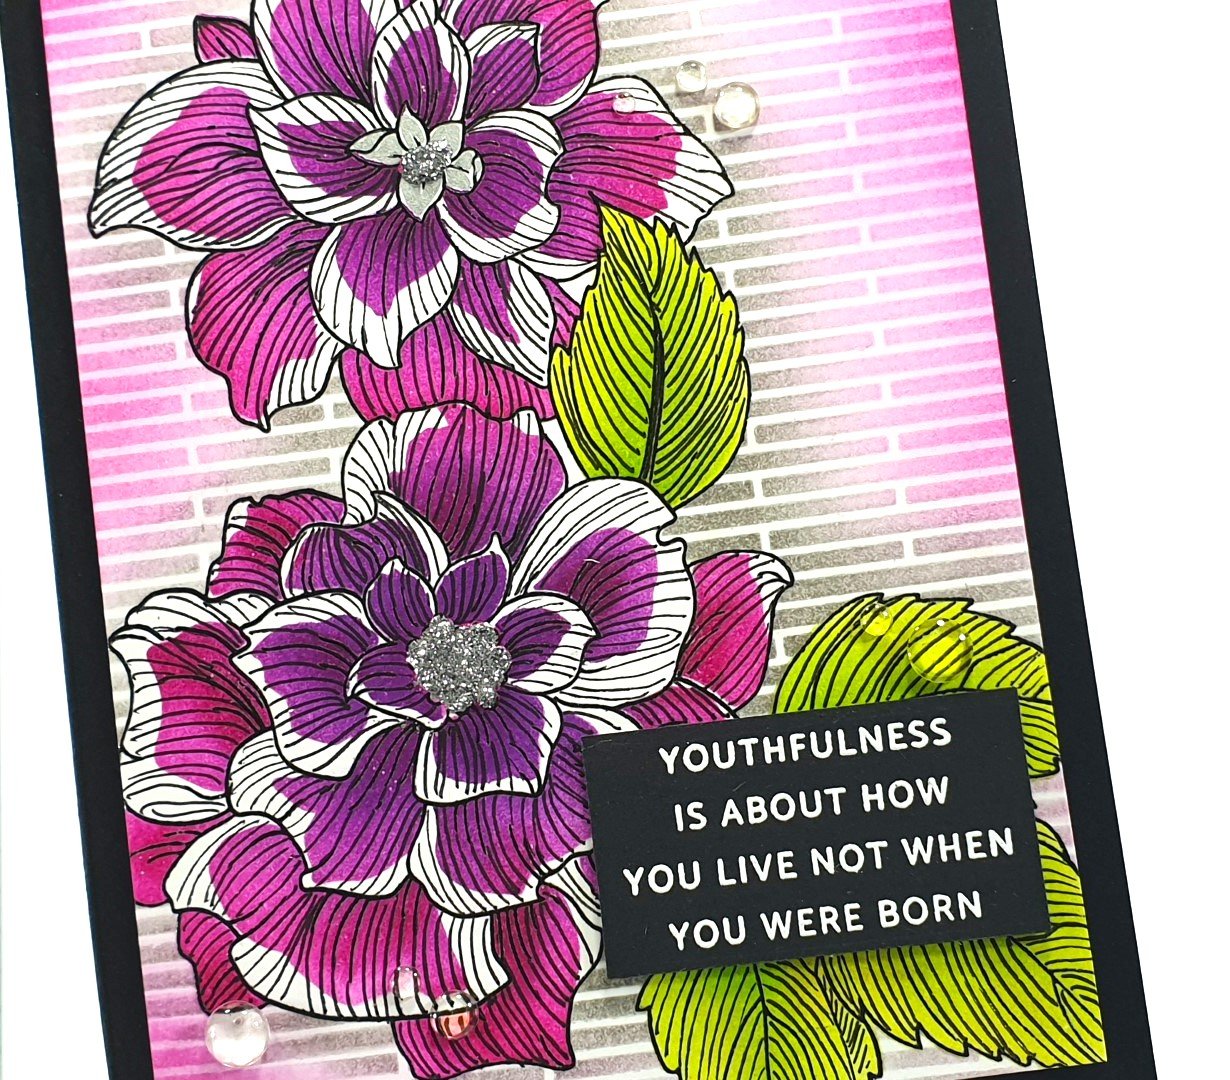
CARD #1, Technique 1
Treat Neenah Solar White 80lb card with anti-static powder.
Stamp Courageous You floral image with Obsidian Pigment Ink, sprinkle with clear embossing powder, and melt embossing powder with a heat gun.
Place Courageous You Simple Coloring Stencil on stamped image and apply ink using small blending brushes and mini blending brushes, as required.
Stamp Courageous You floral image on masking paper and fussy cut.
Note: Do not use coordinating die to die cut floral image as it will leave a white outline.
Place fussy cut mask on Courageous You floral image.
Place Narrow Brick Stencil on top of Courageous You floral image mask and apply ink with small blending brushes to the background.


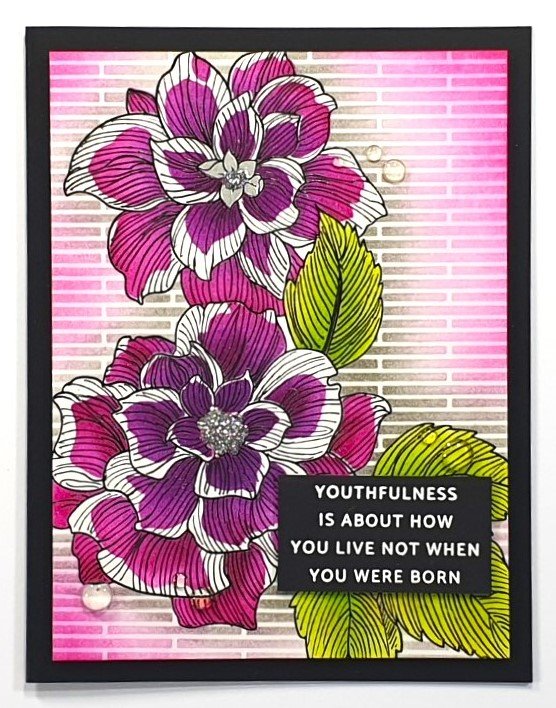
CARD #2, Technique 2
Follow steps #1 to #6 of Technique 1 above.
Use a Fine Liner Pen and draw lines on the flower petals and leaves of the Courageous You floral image. Note: When drawing lines, follow the shape of the petal and leaf, while trying to draw lines that are of a consistent distance from each other.


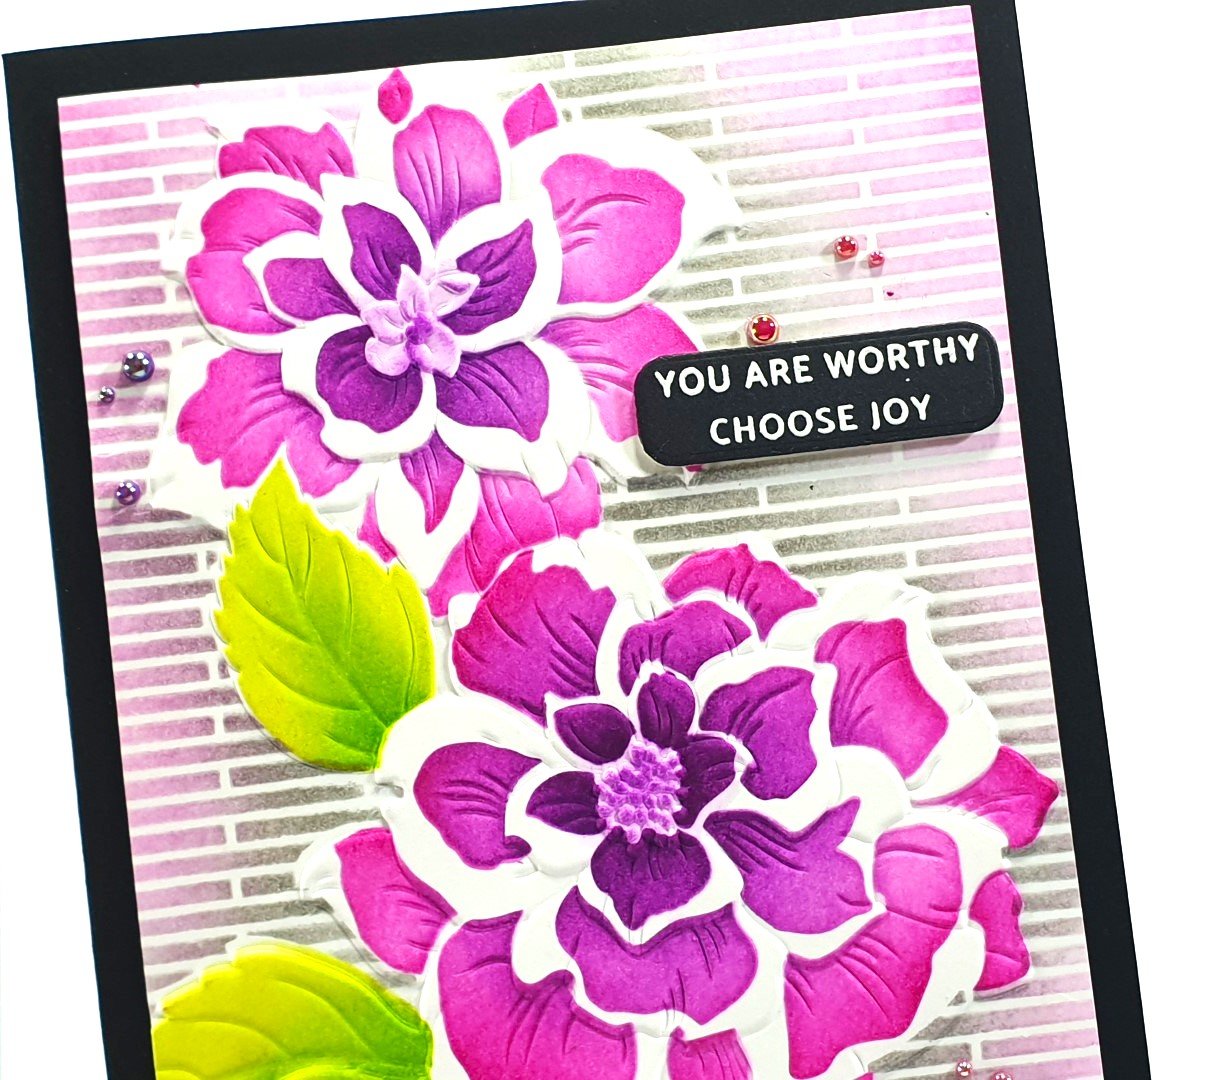
CARD #3, Technique 3
Cut Strathmore Mixed Media Vellum Surface paper to slightly bigger that card base, and lightly wipe a damp stamp shammy onto the front and back of paper. Note: This will soften the fibres of the paper, and thus prevent the paper from cracking when dry embossing with an embossing folder.
Insert Strathmore Mixed Media Vellum Surface paper panel into Sunshine Blooms 3D Embossing Folder and run through embossing machine.
Note: Follow manugacturer’s guidance of the layers required for the ‘sandwich’ to emboss with a 3D Embossing Folder, as this is a different ‘sandwich’ than for a 2D Embossing Folder. Failure to do so may crack your plates and/or not result in the desired effect of embossing.
Flip over the Courageous You Simple Coloring Stencil and place on embossed image. Then apply ink using small blending brushes and mini blending brushes, as required.
Stamp Courageous You floral image on masking paper and fussy cut.
Note: Do not use coordinating die to die cut floral image as it will leave a white outline.
Place fussy cut mask on Courageous You floral image.
Place Narrow Brick Stencil on top of Courageous You floral image mask and apply ink with small blending brushes to the background.


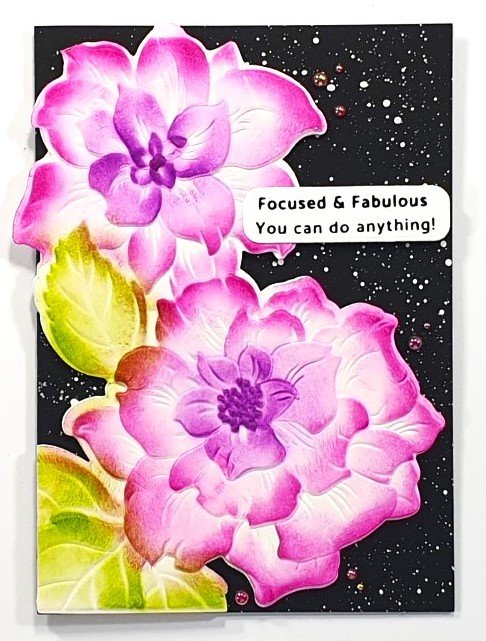
CARD #4, Technique 4
Follow steps #1 & #2 of Technique 2 above.
Apply ink with a light hand on embossed image. The raised areas will be darker. Note: The Simple Coloring Stencil is not required for this technique.
Stamp Courageous You floral image on masking paper and fussy cut.
Note: Do not use coordinating die to die cut floral image as it will leave a white outline.
Place fussy cut mask on Courageous You floral image.
Place Narrow Brick Stencil on top of Courageous You floral image mask and apply ink with small blending brushes to the background.


CARD #5, Technique 5
Die cut the outline of the Courageous You floral image on Strathmore Mixed Media Vellum Surface paper with the Courageous You coordinating die.
Flip die cut, and lightly wipe a damp stamp shammy onto the front and back of die cut. Note: This will soften the fibres of the paper, and thus prevent the paper from cracking when dry embossing with an embossing folder.
Insert into the Sunshine Blooms 3D Embossing Folder and run through embossing machine.
Apply ink with a light hand on embossed image. The raised areas will be darker. Note: The Simple Coloring Stencil is not required for this technique.


Disclosure: Where available I use compensated affiliate links which means if you make a purchase, I receive a small commission at no extra cost to you. Thank you so much for your support!

Thank you for stopping by and do leave a comment if you have a question or just want to say hi.